Visual walkthrough: getting started
This guide walks through a Didacta installation from scratch, exactly as any new self-hoster would see it: the release image is built, docker-compose.alpha.yml is brought up with no pre-existing data, and the real path of an operator is completed — setup wizard, branding, first course, enrolling students and a certificate — with an annotated screenshot at every step.
Where these screenshots come from
They were taken against an isolated, ephemeral instance with no seeds, started from a published release tag. The organization, course and people names are examples (Academia Demo, Admin Demo, Alumna Demo) — replace them with your own.
1 · First start and setup wizard
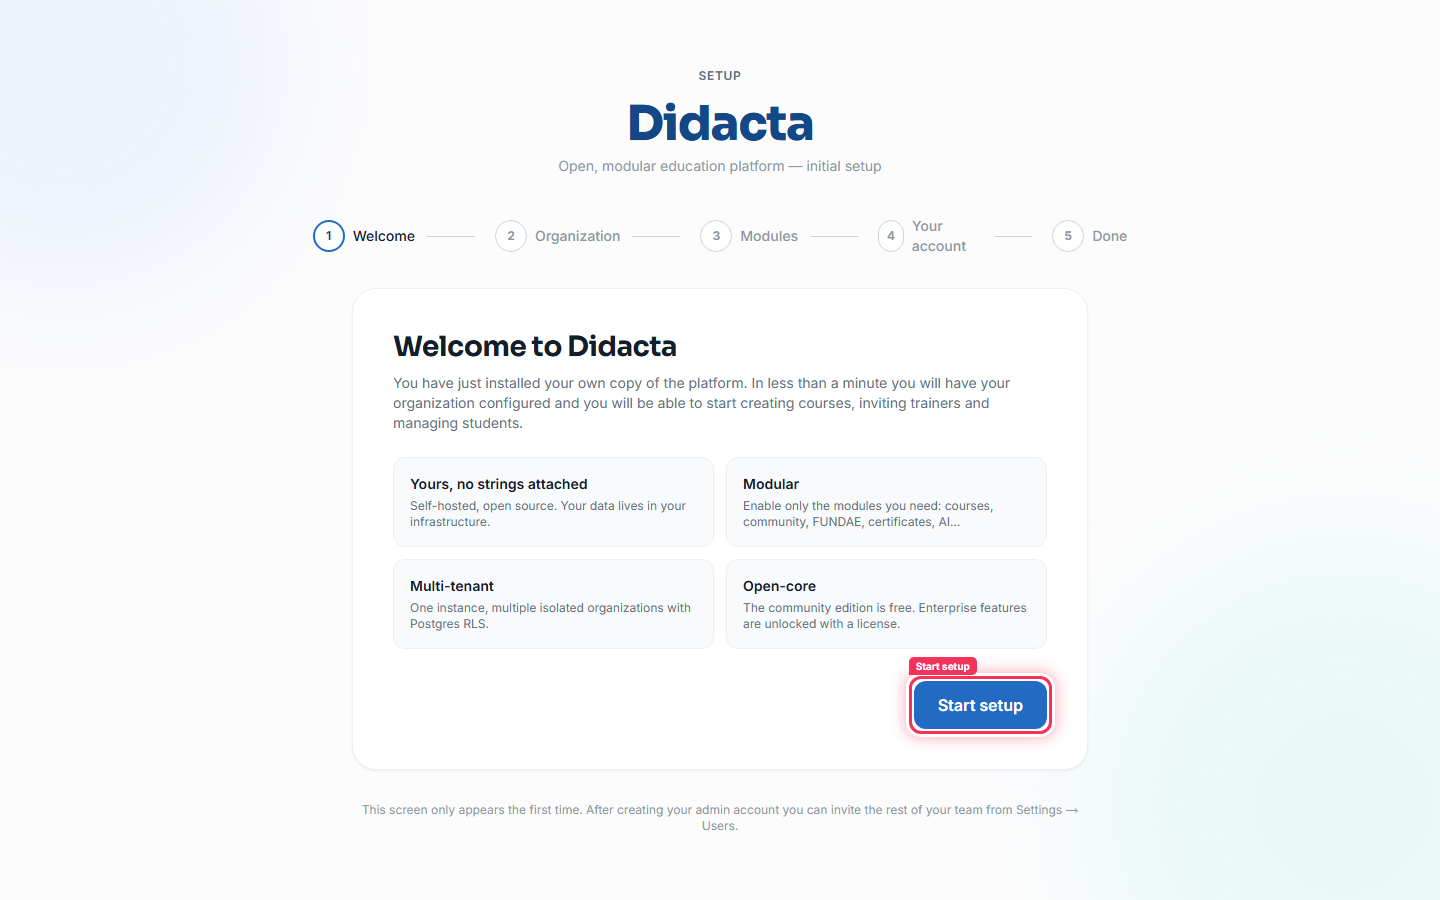
The first time you connect, Didacta redirects every route to /setup. The welcome screen summarises what you are about to configure in under a minute.
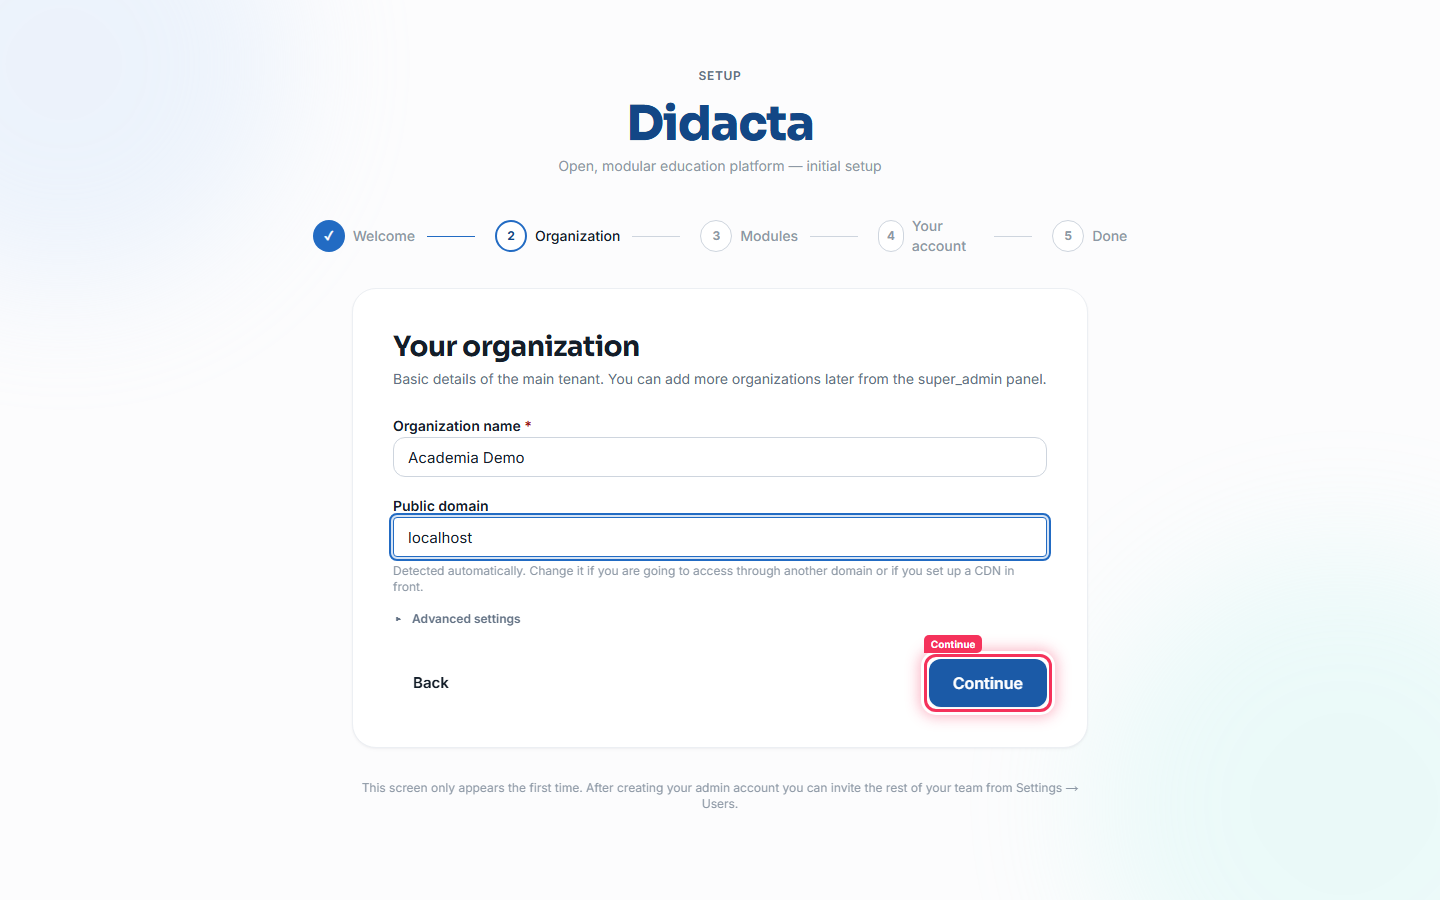
The second step asks for the organization name and the public domain (the host you are connecting from, editable).
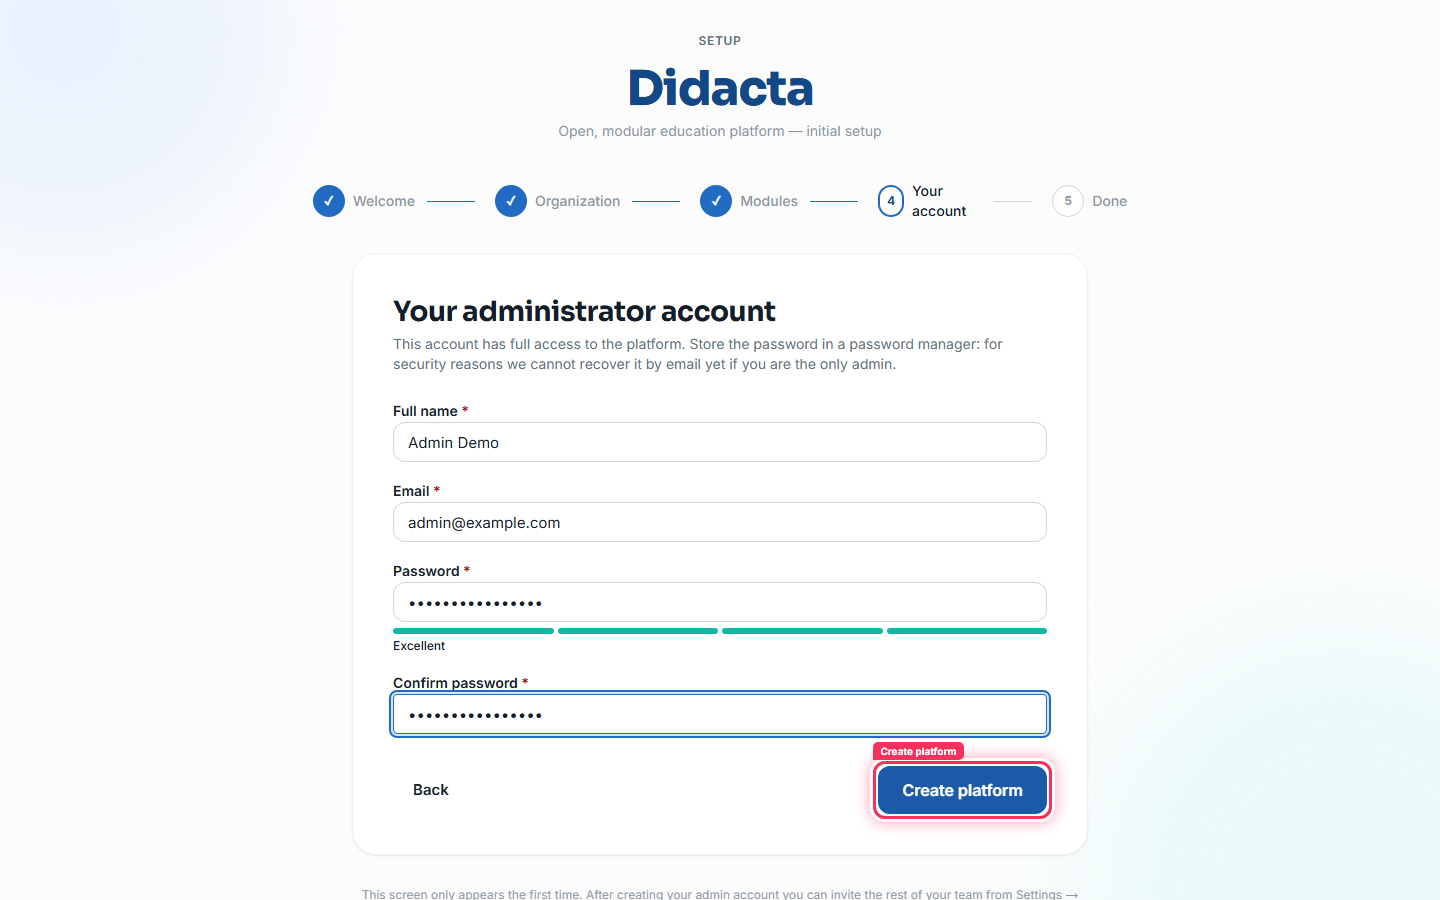
After choosing the active modules (core ones come pre-selected), the wizard asks for the first administrator's details — an account with the super_admin role.
When it finishes, the organization and the administrator already exist and the session is active: there is no need to sign in again.
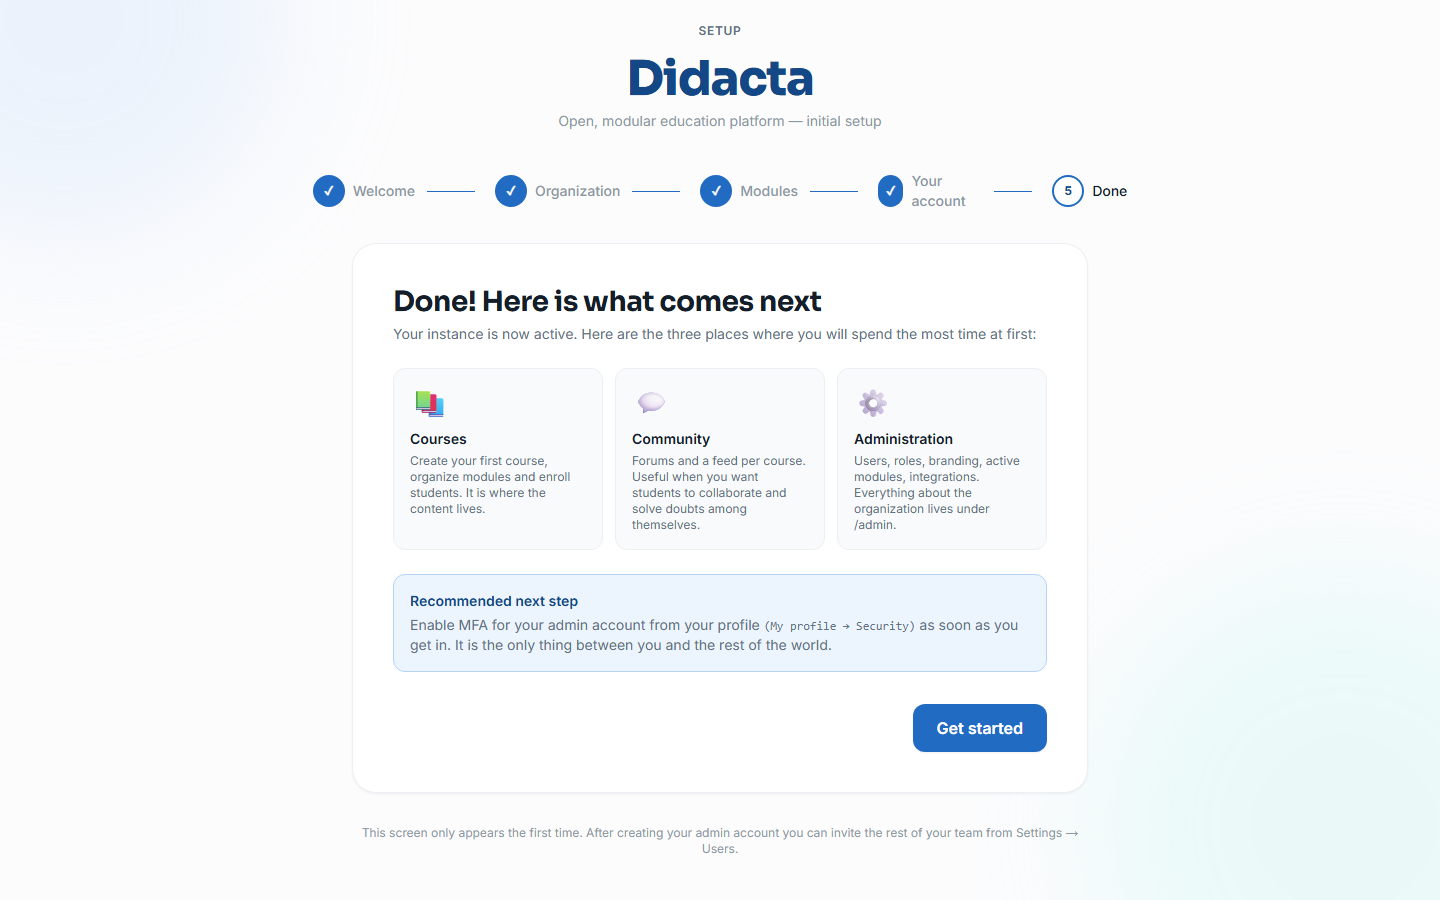
→ Full detail of what the wizard creates in Setup wizard.
2 · Complete your profile
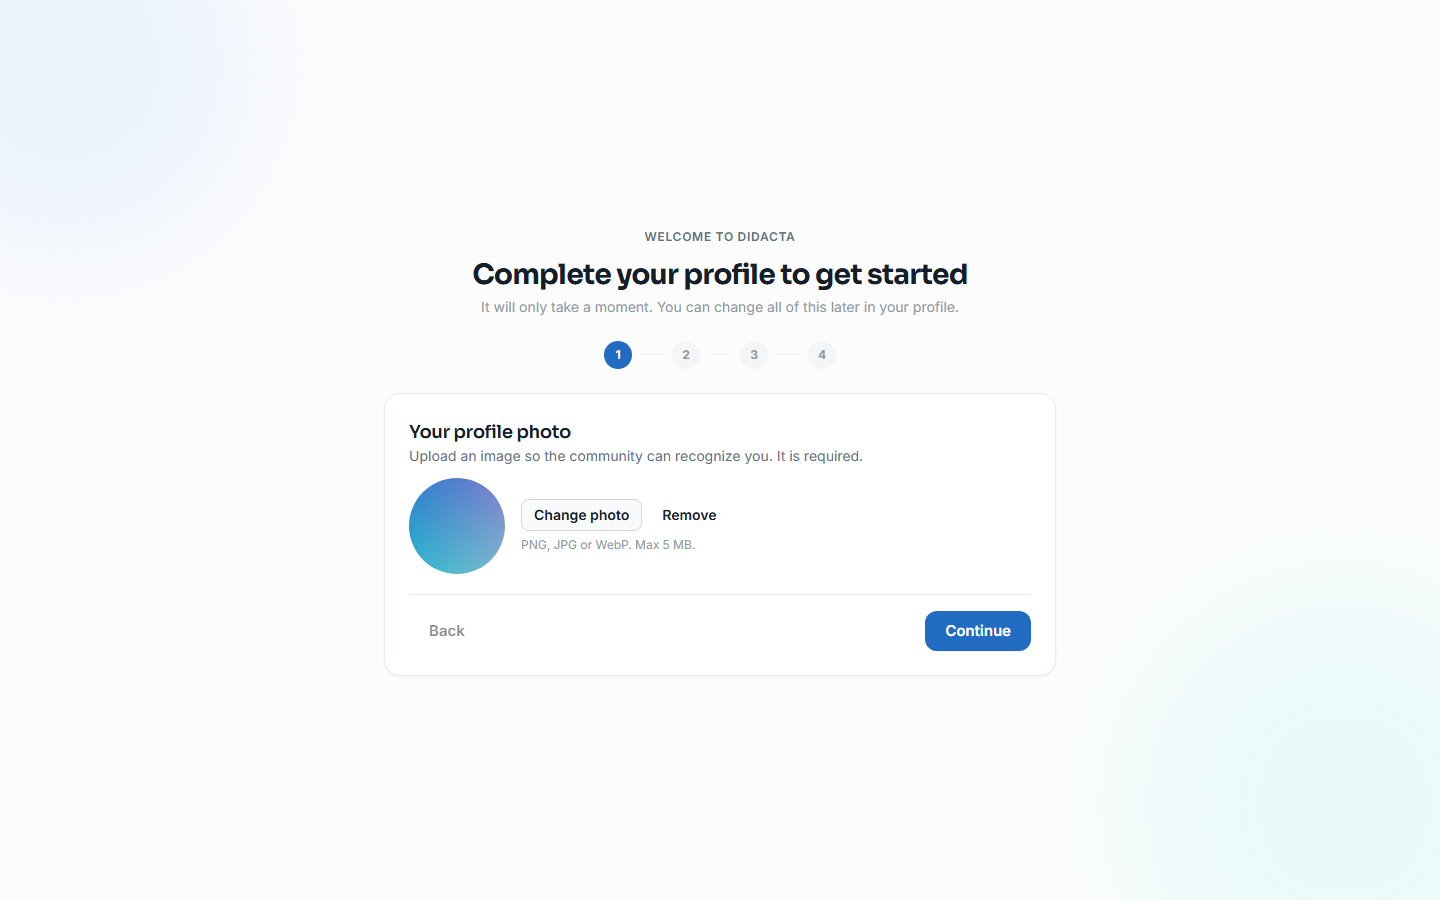
The first time any account signs in (including the administrator's), Didacta asks for a minimal profile — a mandatory photo, name, language and notification preferences — before letting you into the rest of the platform.
3 · Sign in
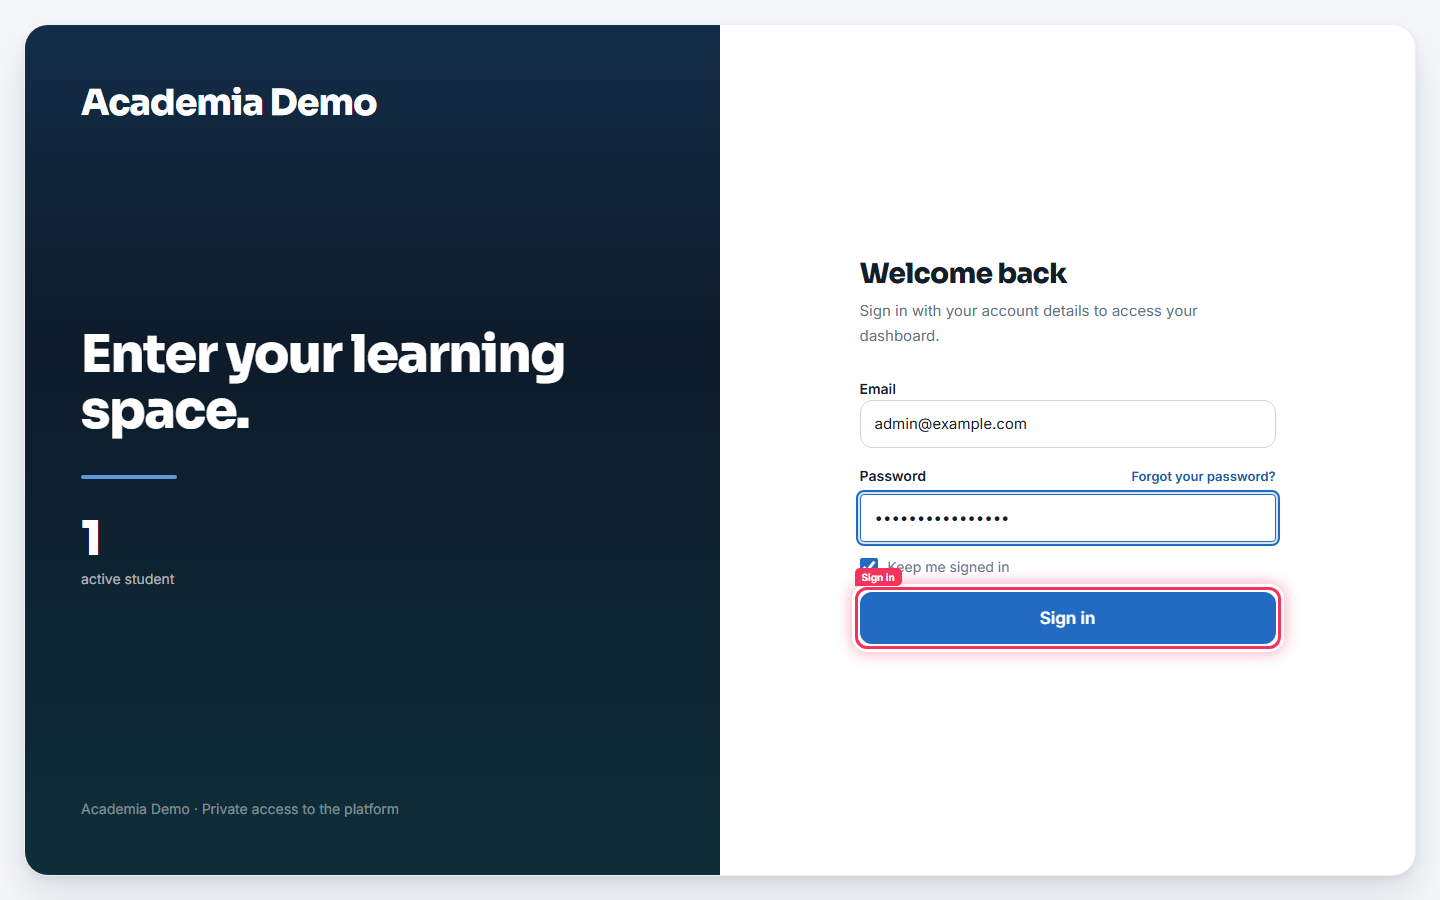
The sign-in screen (/signin) already carries the tenant's branding: name, real figures (active students, published courses) and the copy you configure under Administration → Branding.
4 · Customise your branding
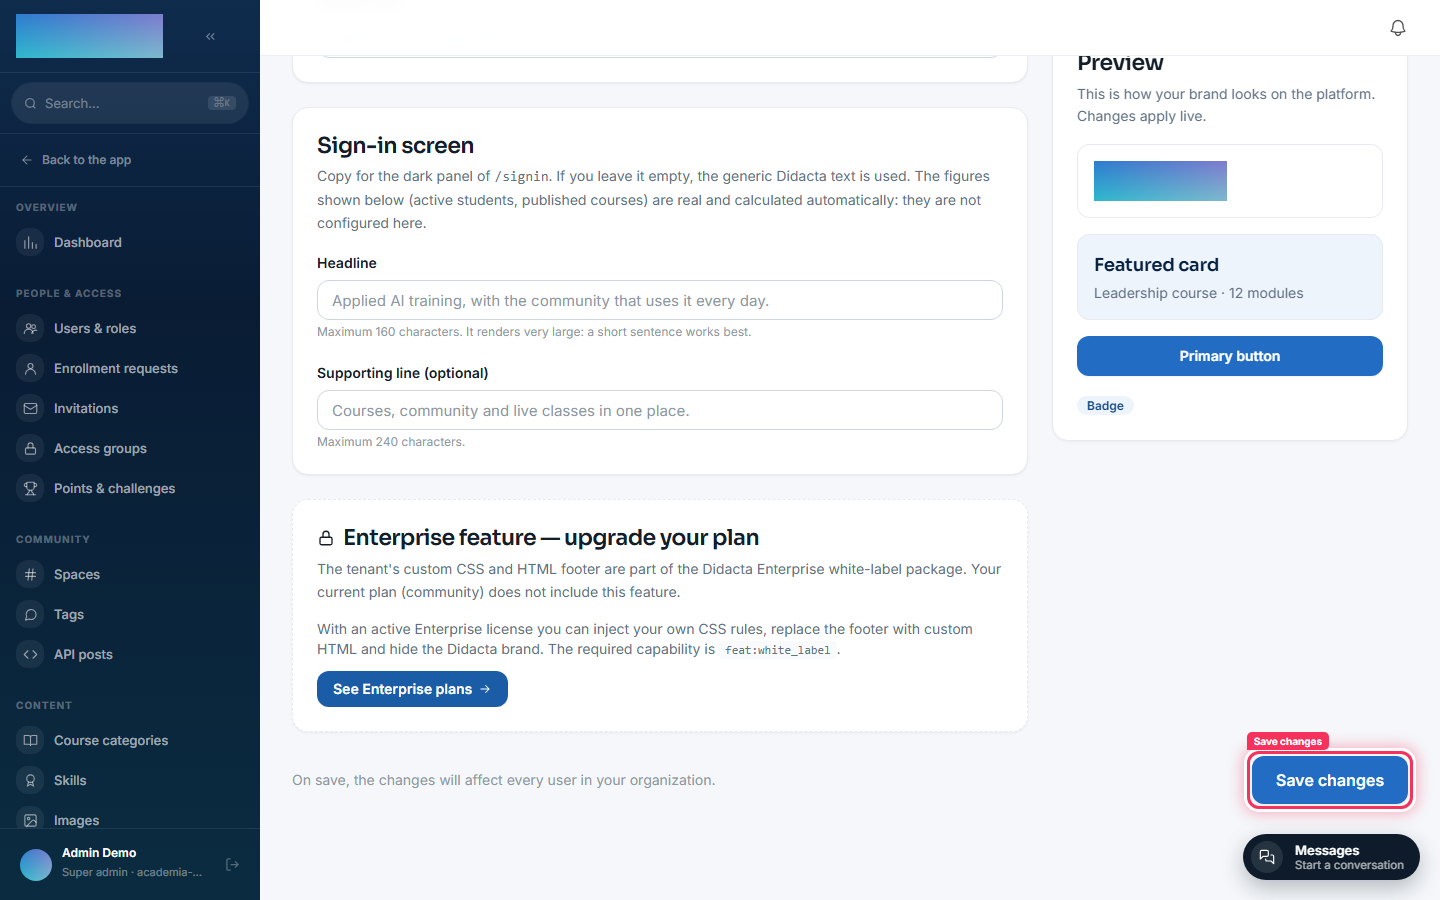
Under Administration → Branding (/admin/branding) you upload the logo and pick the brand color (brandHue). Both are applied instantly to the sign-in screen and the public catalog.
5 · Create your first course
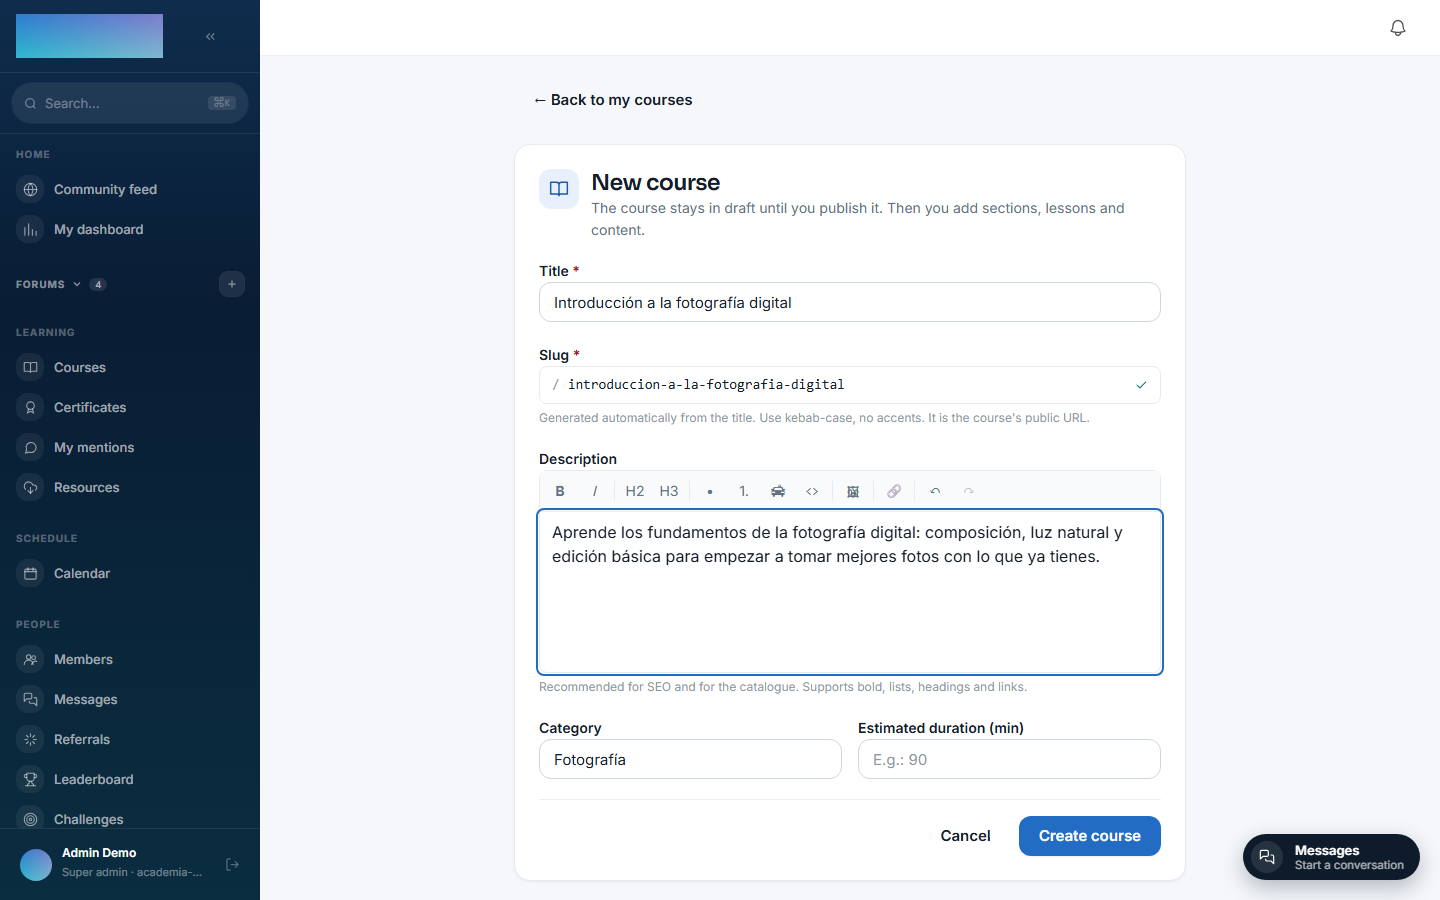
From Instructor → Courses → New course you set the title, description and category. The slug (public URL) is generated from the title. The course starts as a draft.
Inside the course you add sections and, within each section, lessons — here, a text lesson.
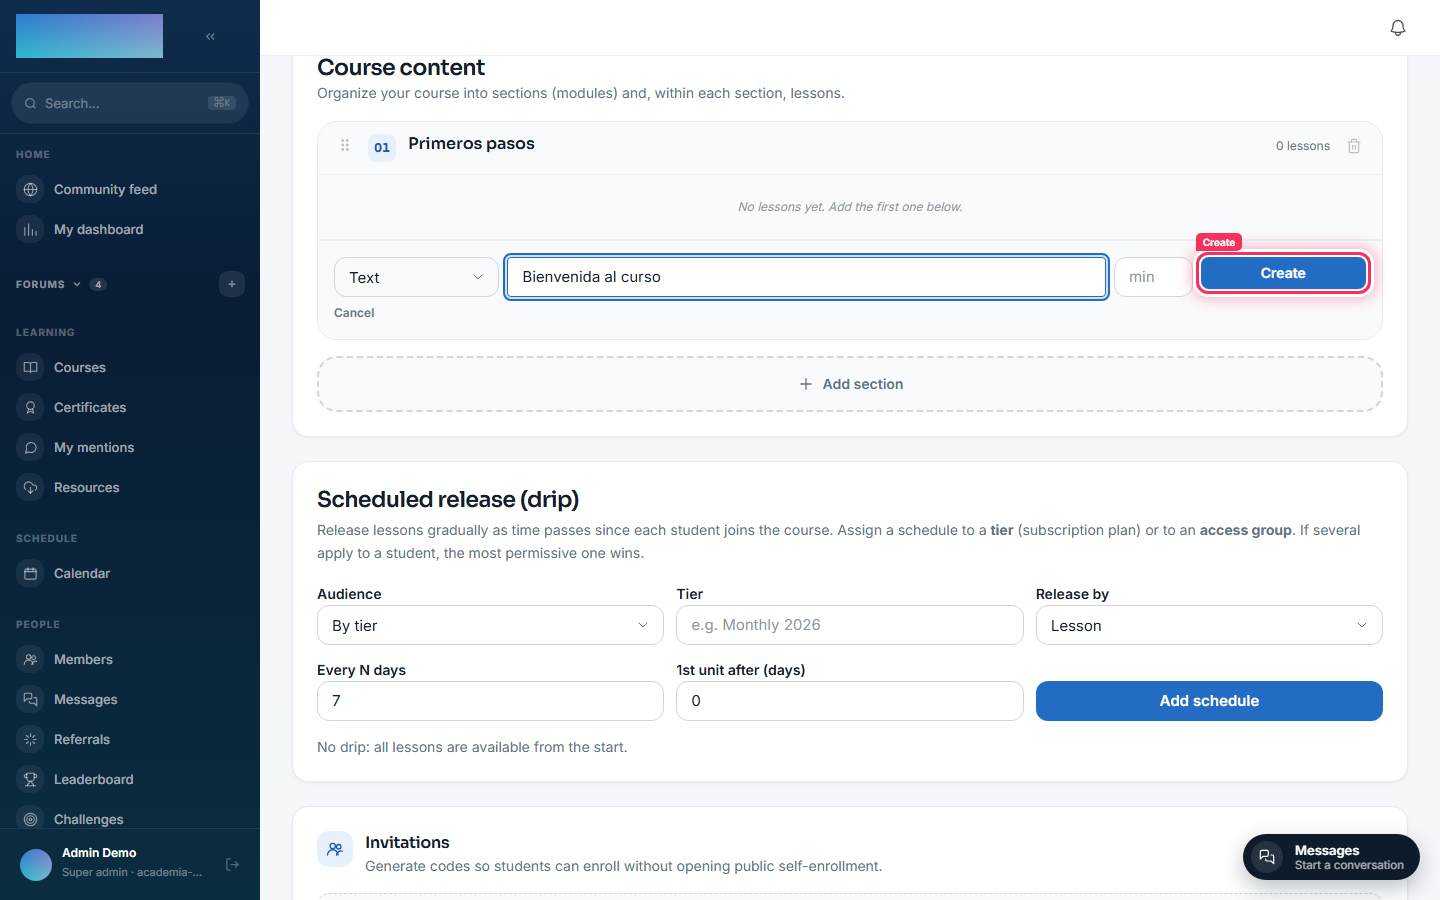
Publishing requires four things (title, description, at least one section and one lesson); the panel tells you what is missing at all times.
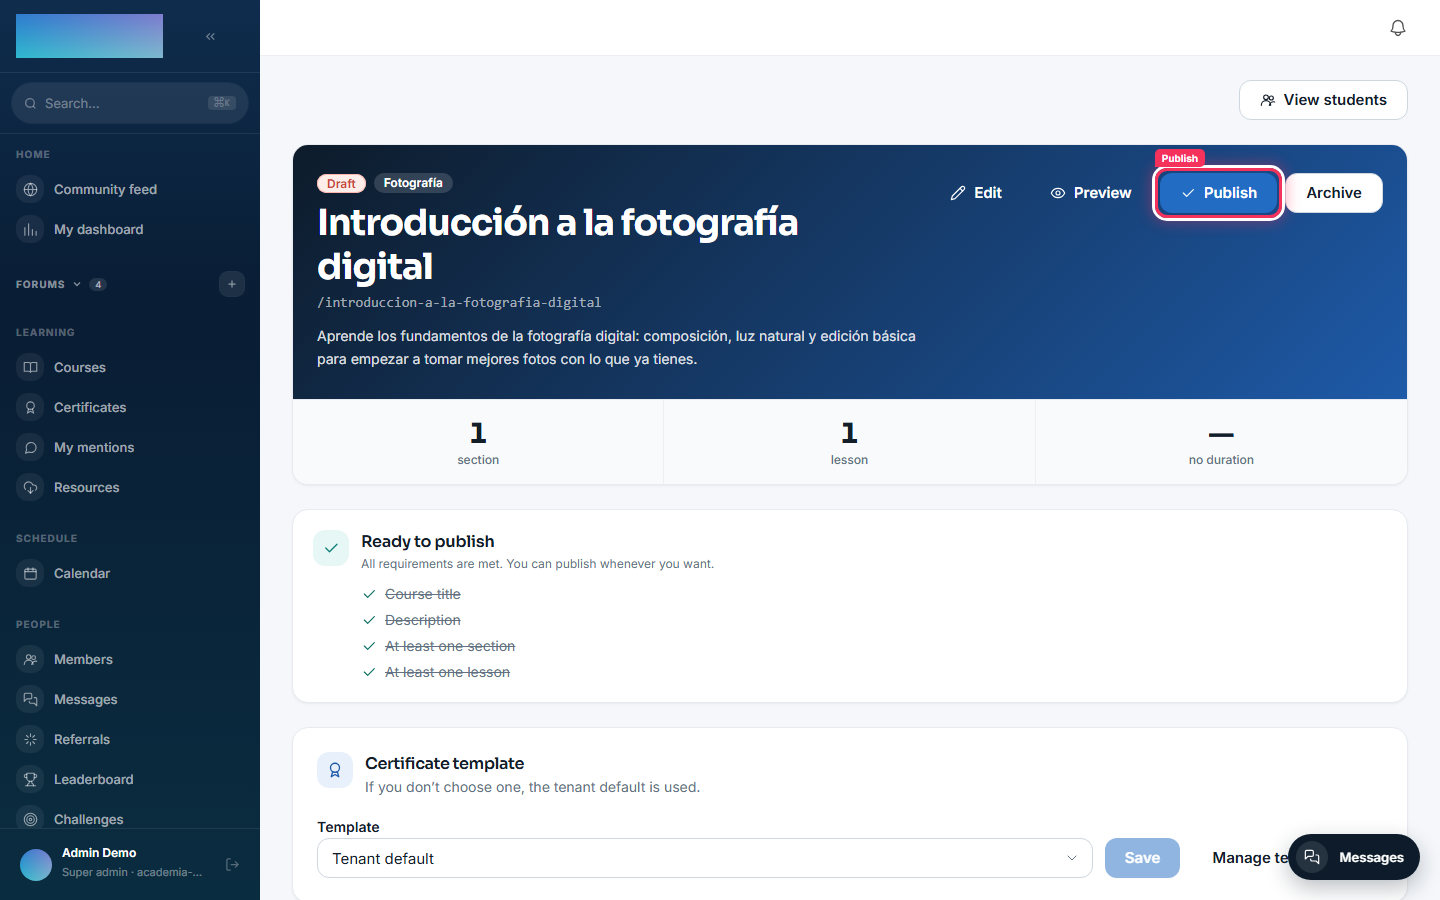
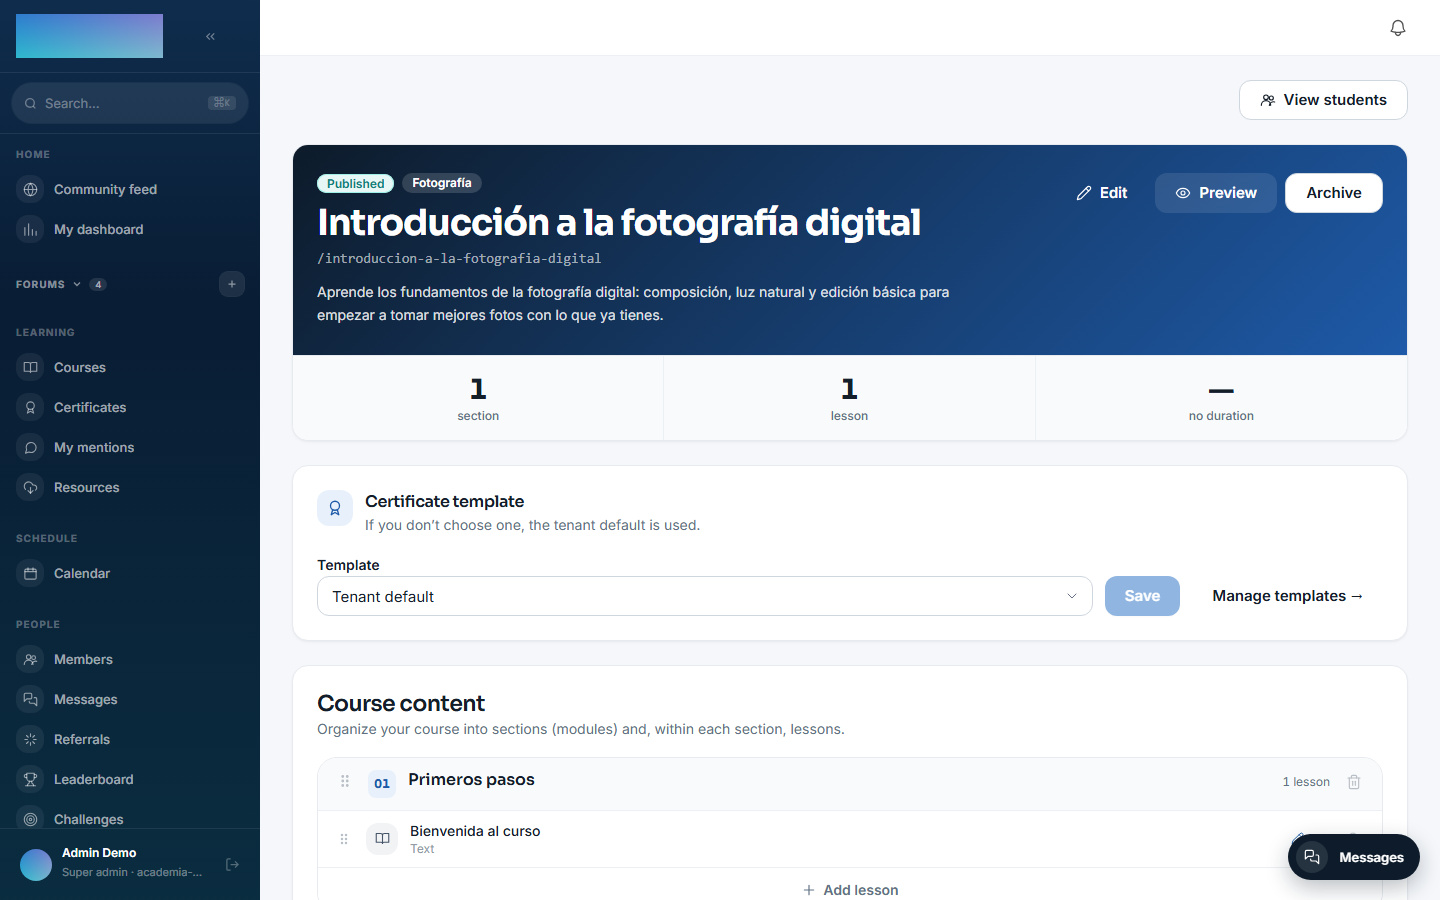
Once everything is in place, the course moves to Published.
6 · Invite your students
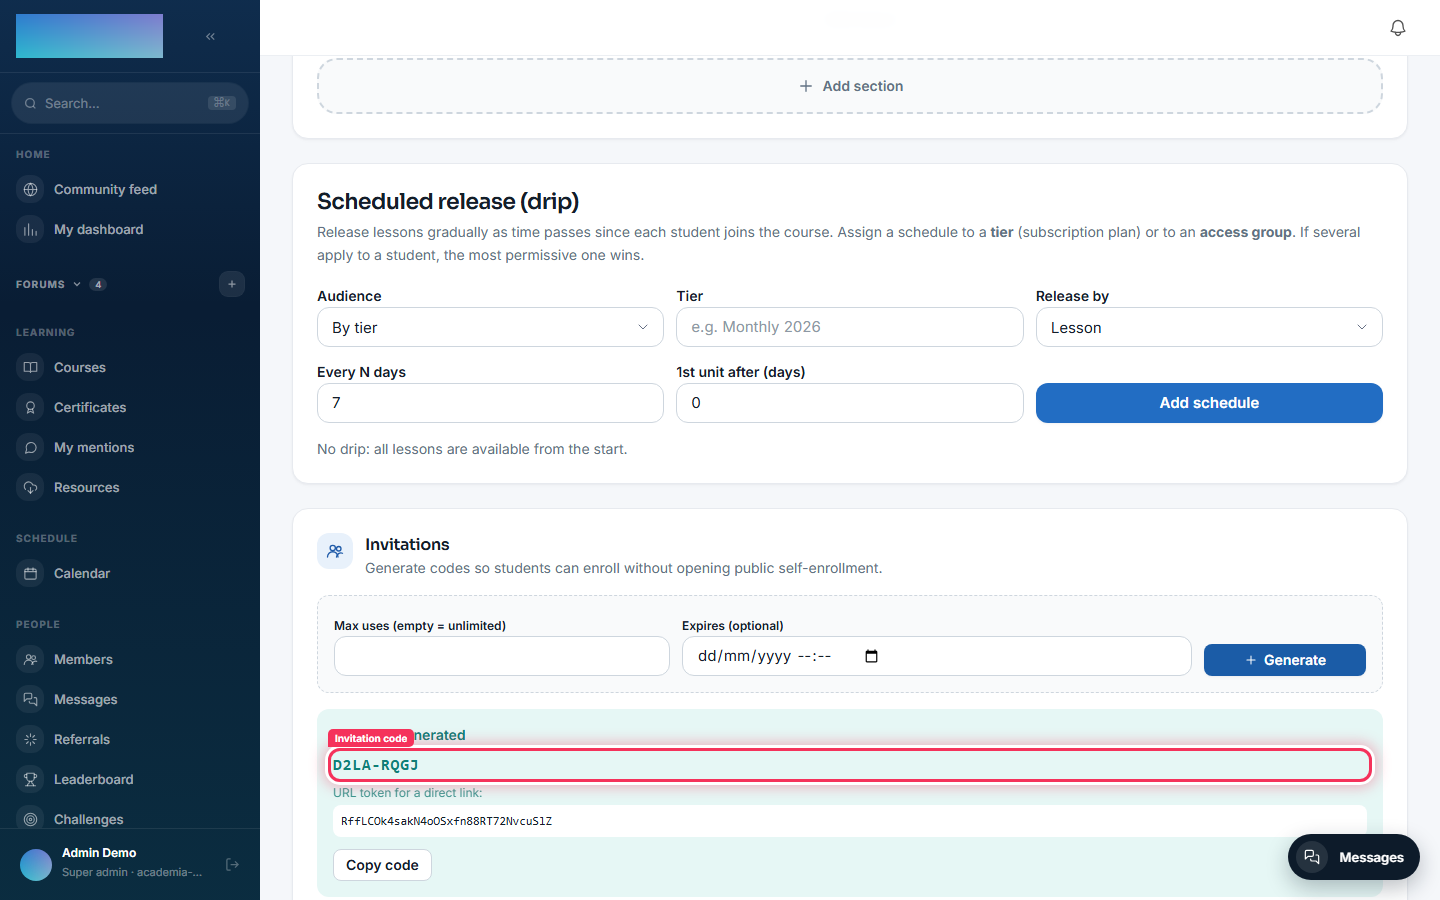
Without public self-enrollment, the normal way for someone to get into a course is an invitation code, generated from the course itself.
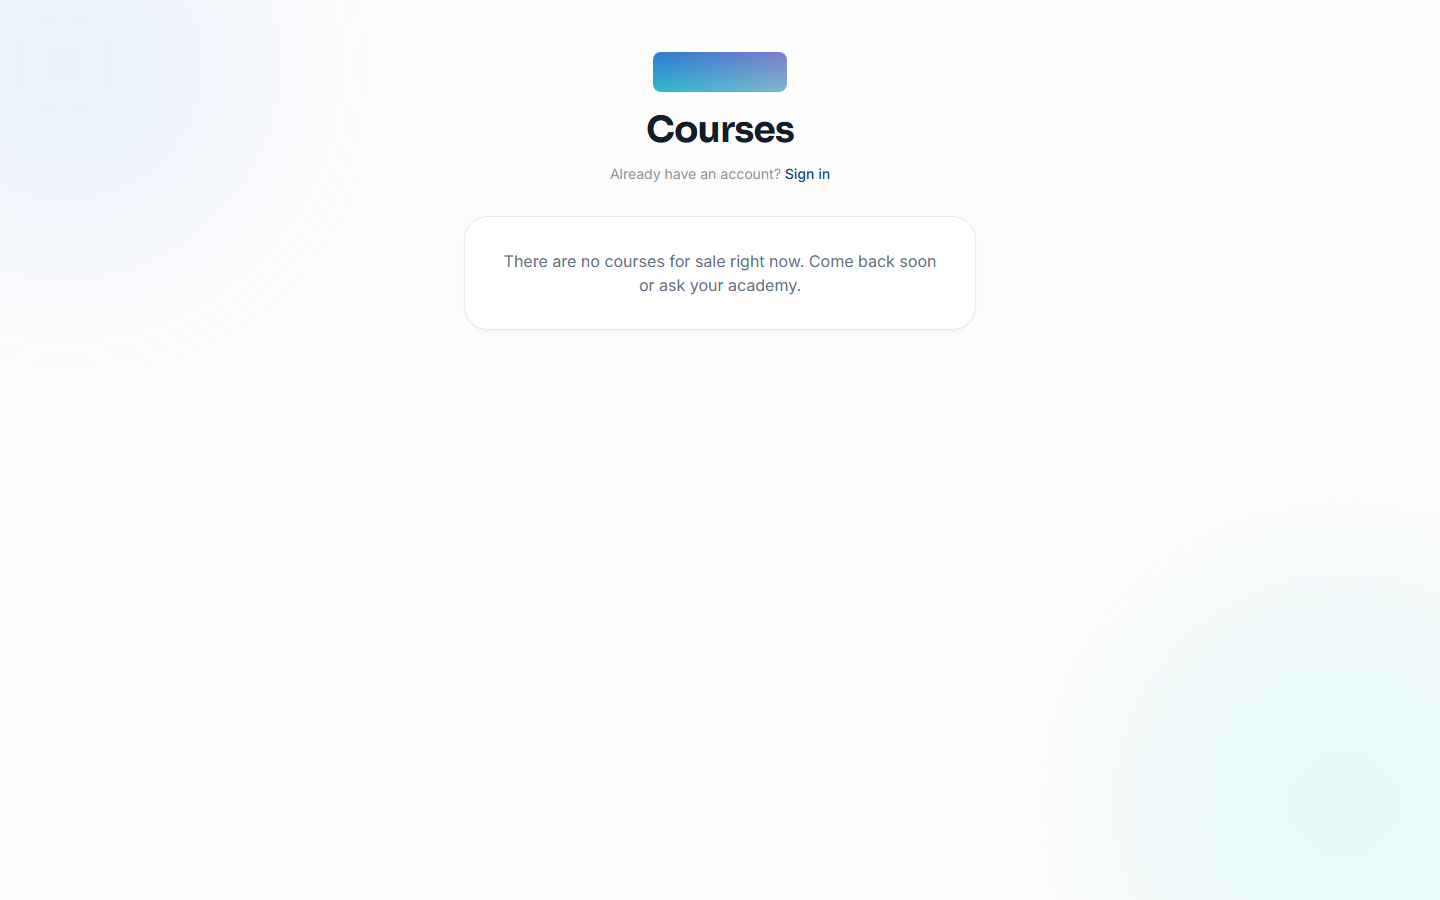
The public catalog (/catalogo) is the sales catalog
/catalogo is the public listing for courses with a price (mod.billing) — designed for a visitor who pays by card without signing up first. A published course with no price configured, like the one in this walkthrough, does not appear there: it is still perfectly reachable by invitation or through the internal catalog once students are signed in. See Three ways to fill your academy.
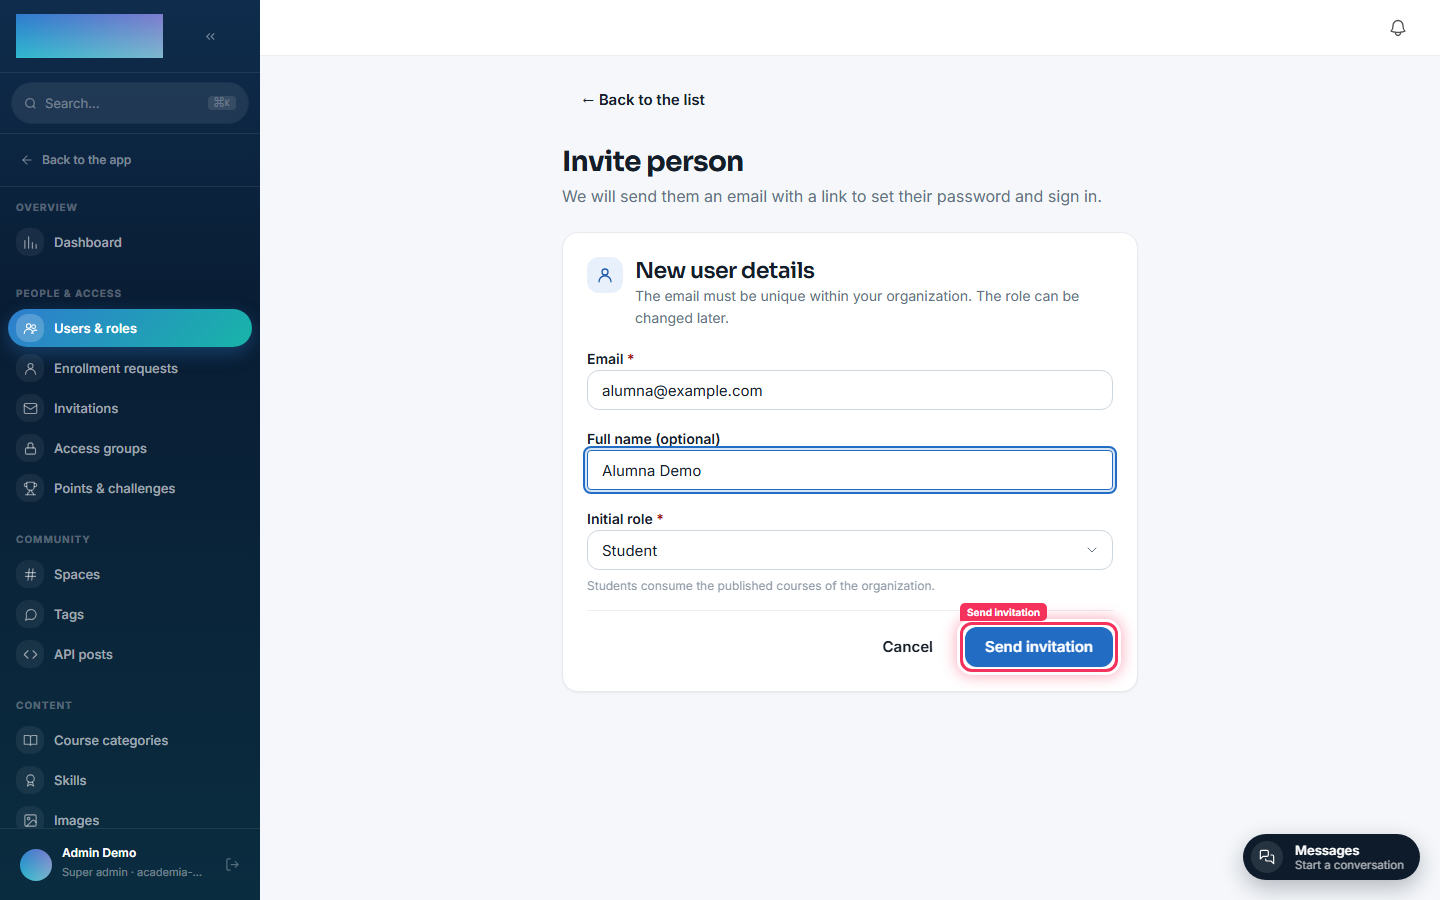
To add someone directly, Administration → Users & roles → Invite person creates the account already active and sends them an email to set their password.
7 · The student signs in and enrolls
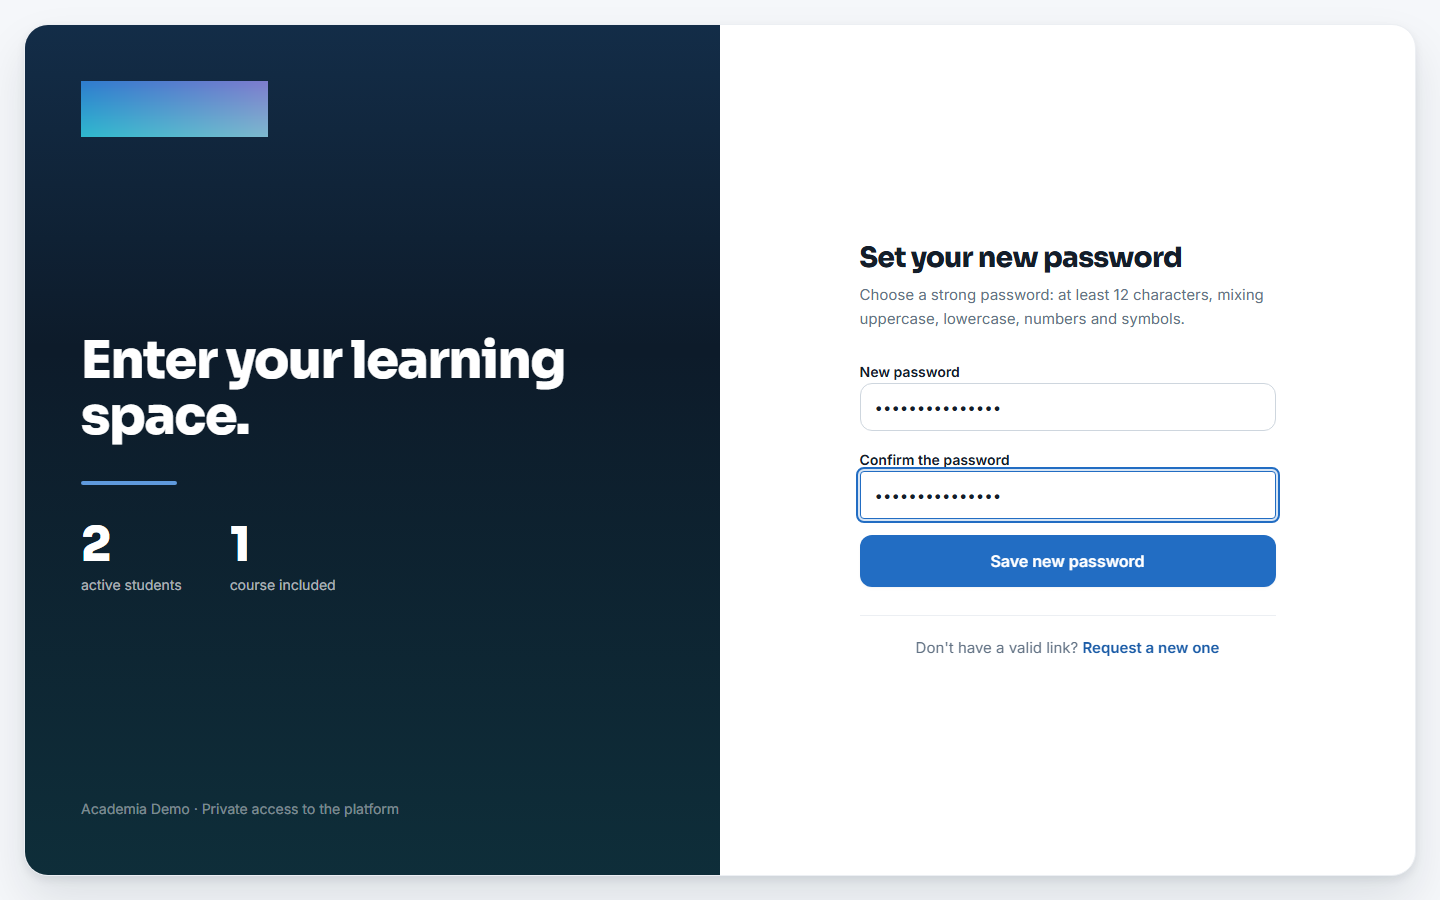
From the link in the email, the student sets her password.
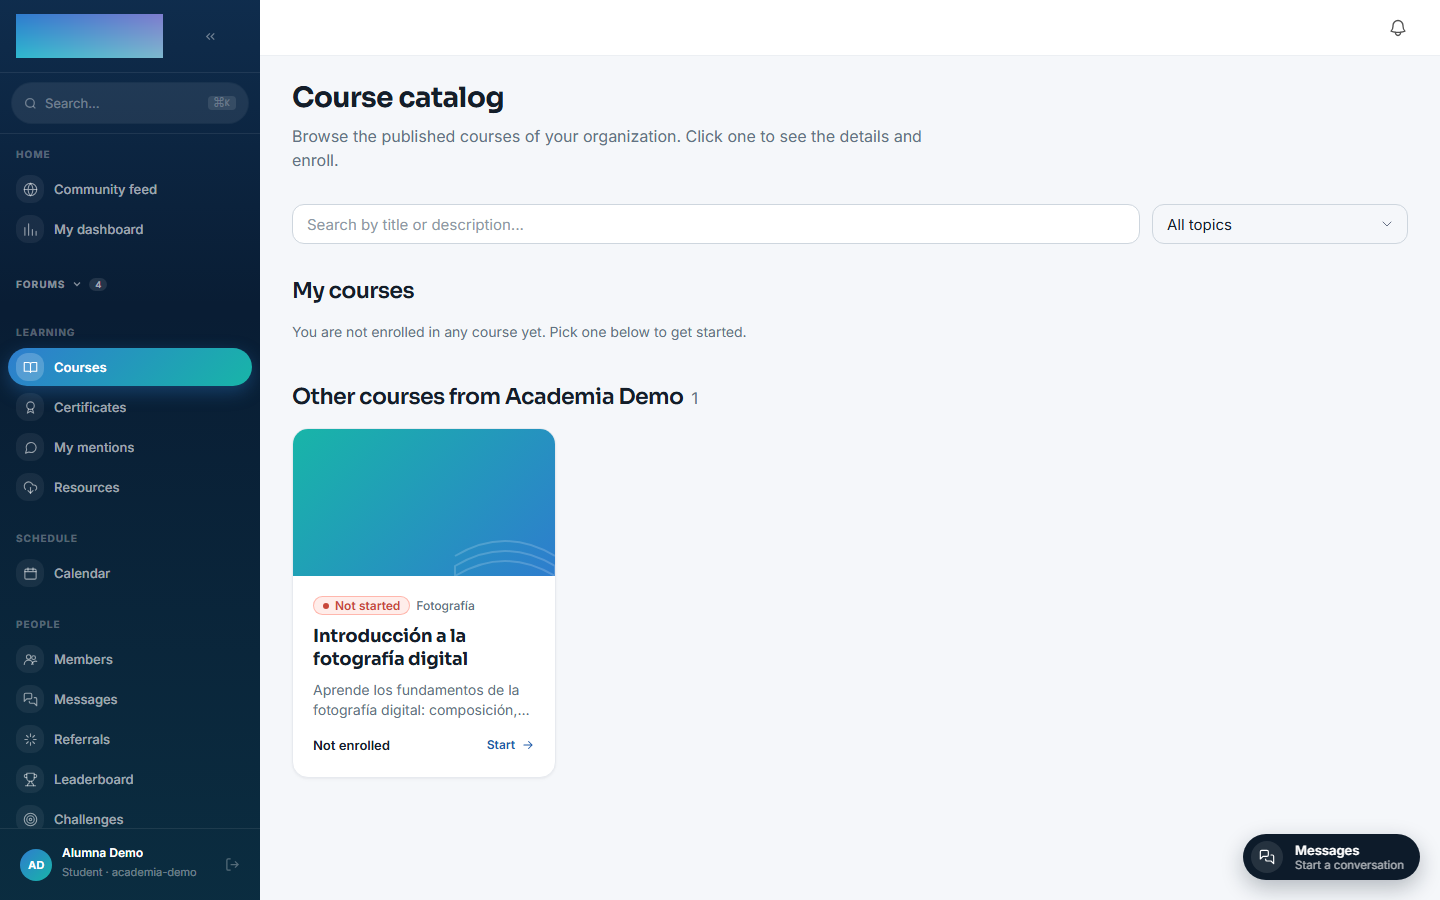
Once signed in, /cursos is the app's internal catalog: it lists every published course in the organization, priced or not (unlike the /catalogo sales listing from the previous step).
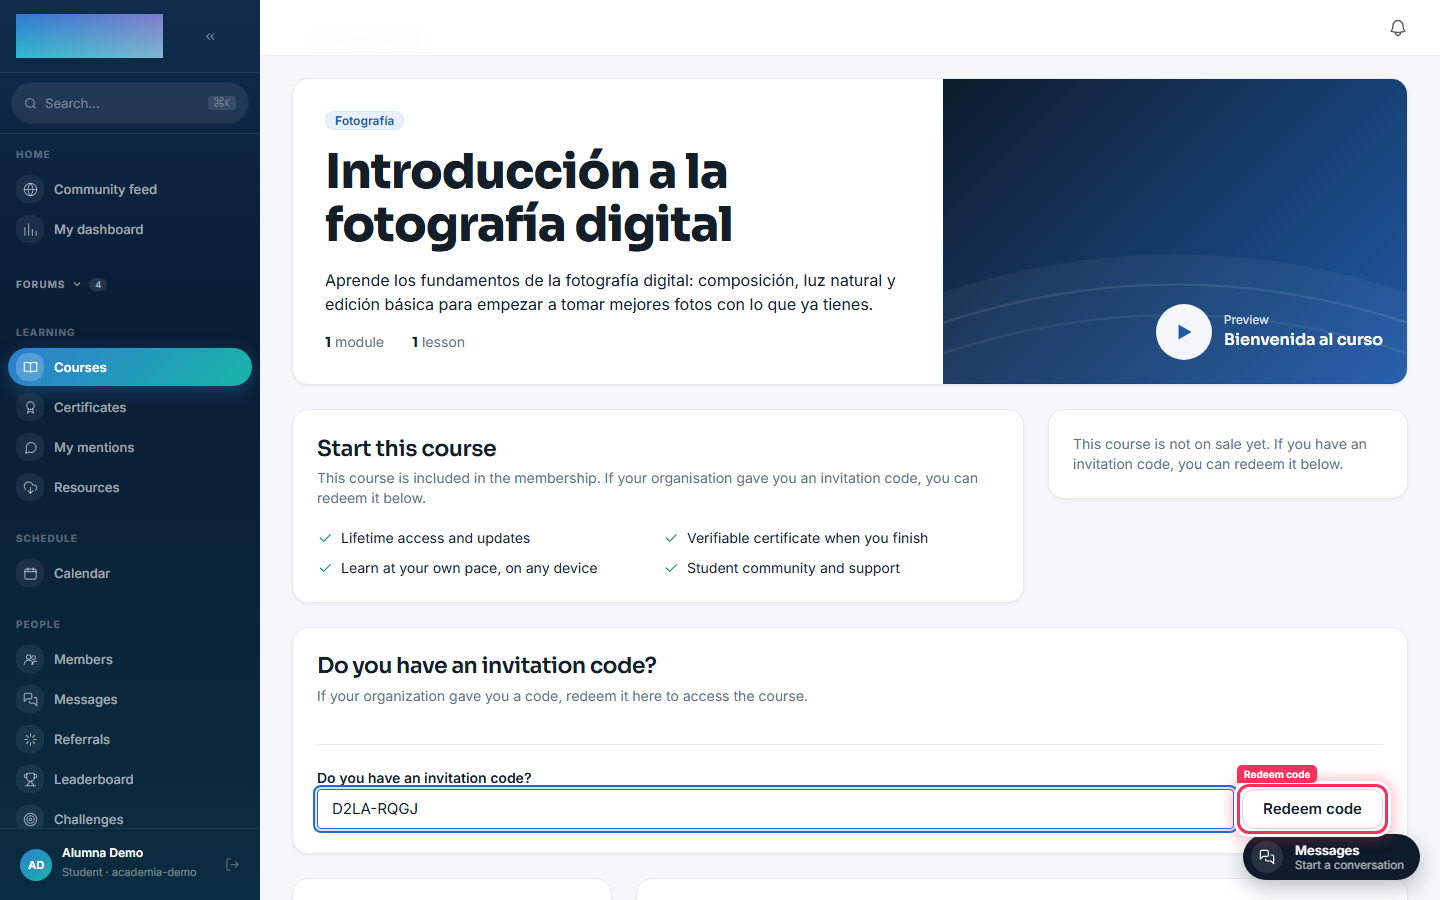
On the course page, she redeems the invitation code the organization gave her.
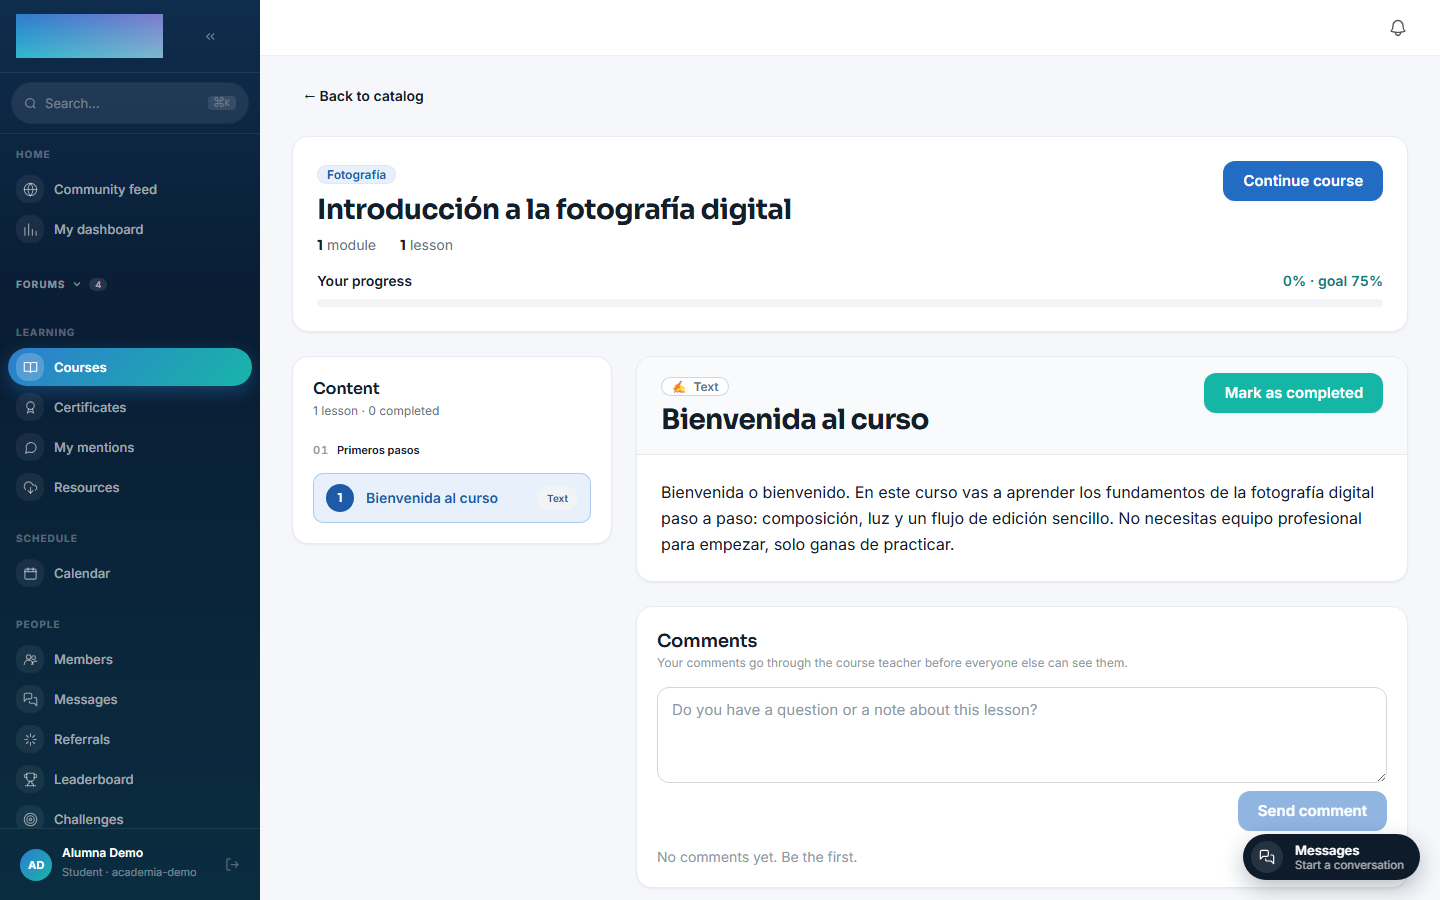
Redeeming it enrolls her instantly and shows her progress dashboard.
8 · Complete the lesson and download the certificate
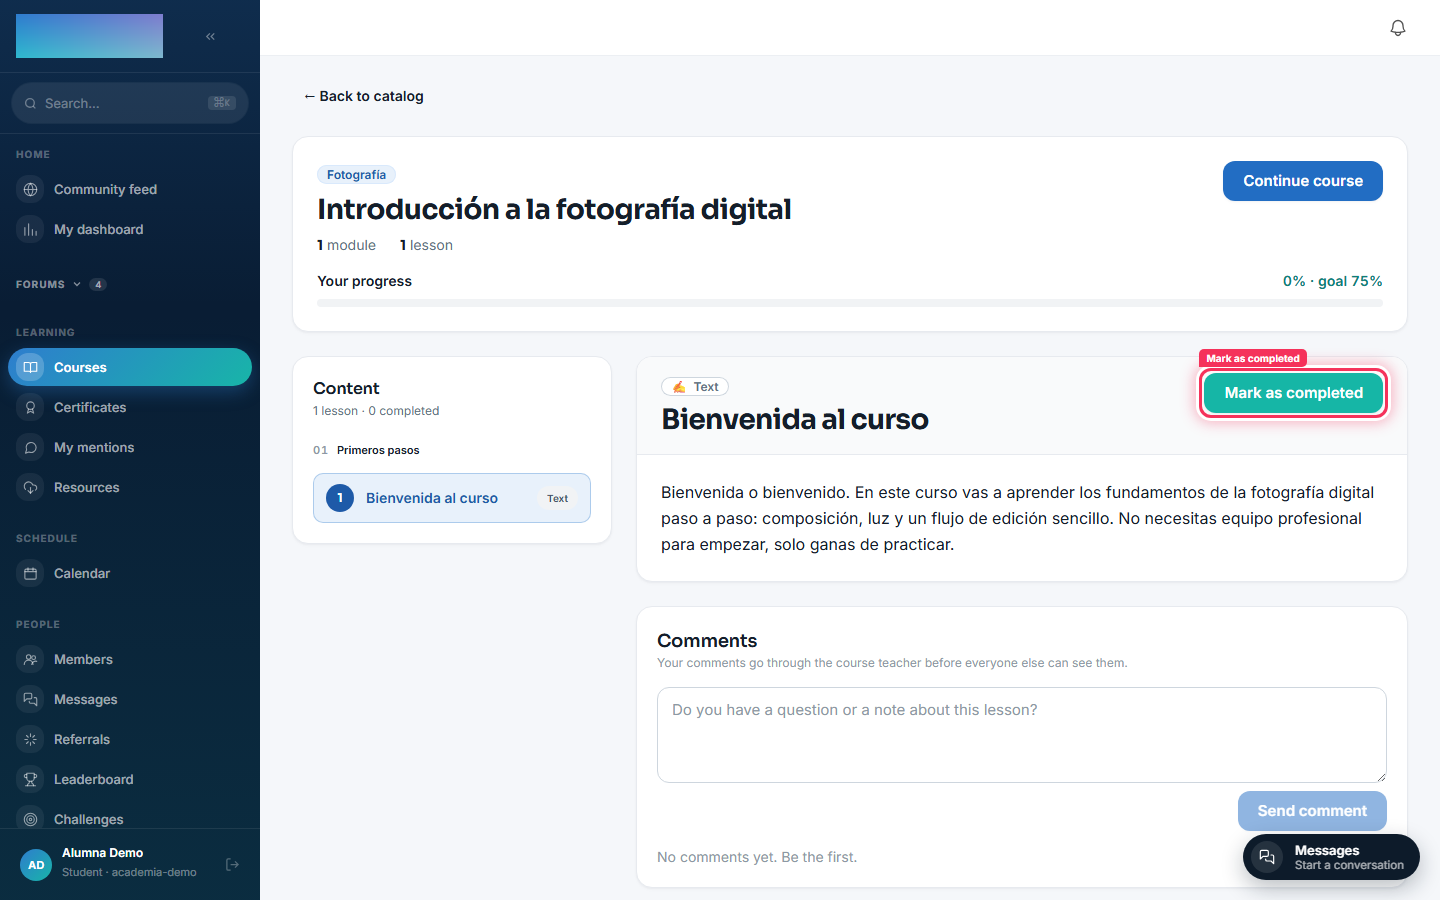
The lesson player shows the content and, for types such as text or PDF, a button to mark it as completed manually.
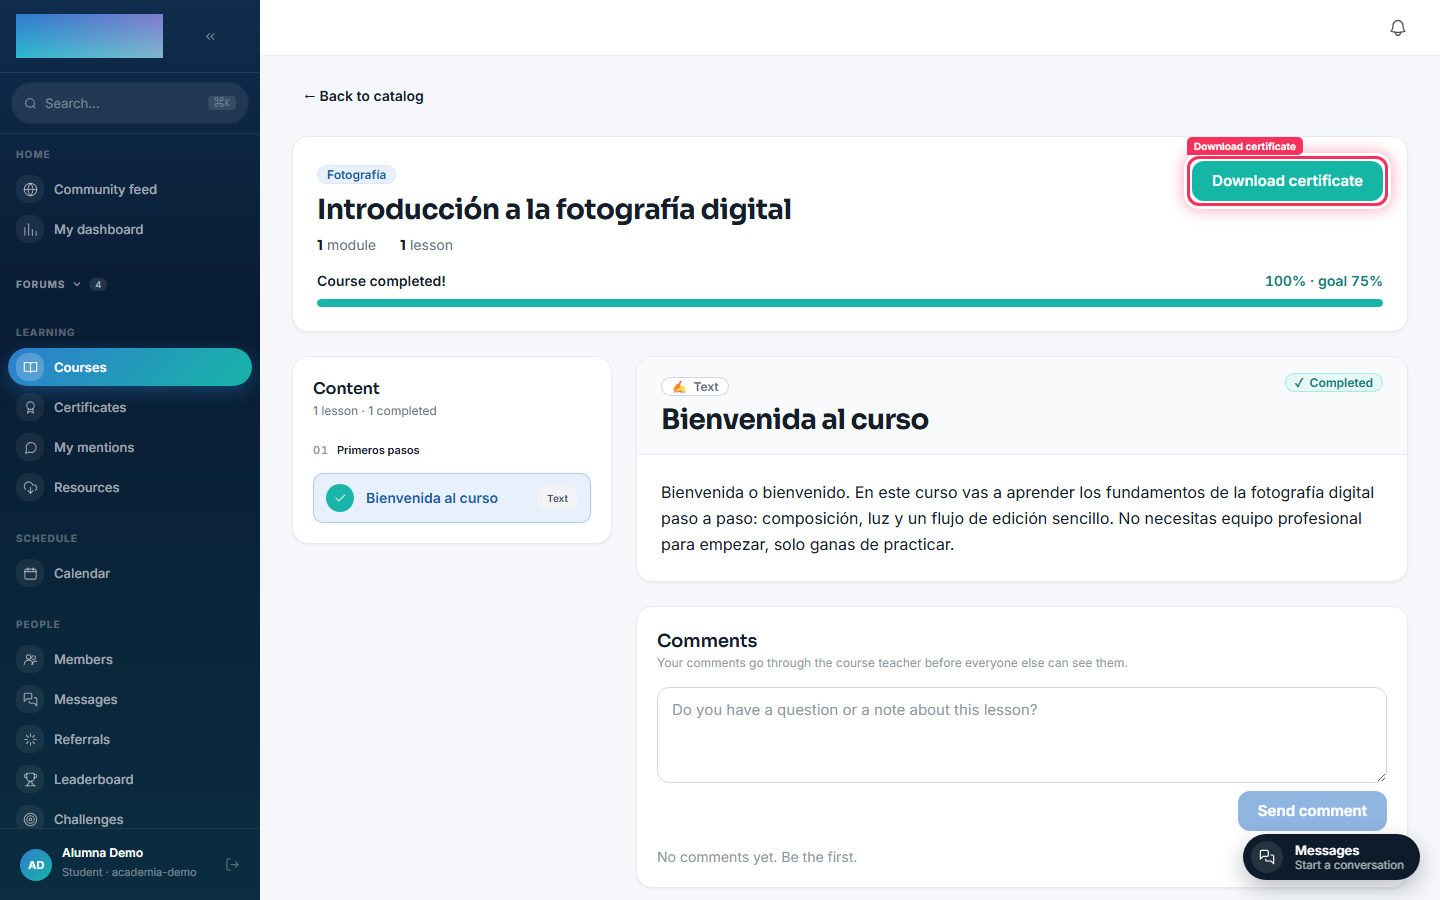
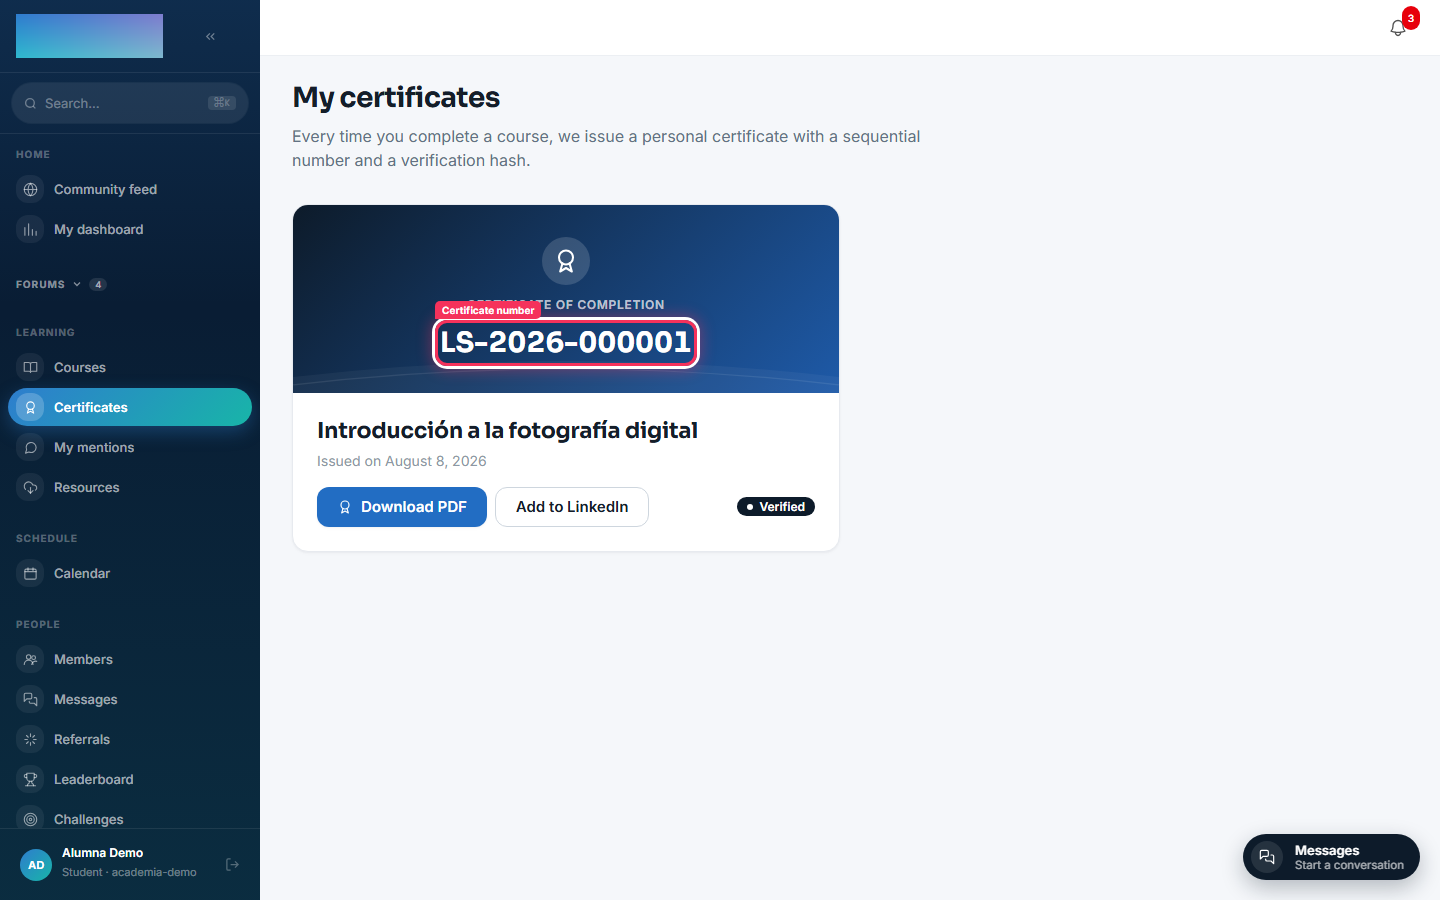
Once the course completion threshold is reached, Didacta issues the certificate automatically and the hero button changes to "Download certificate".
All of a student's certificates are also kept at /mis-certificados, with a verifiable sequential number.
9 · A look at Administration → License
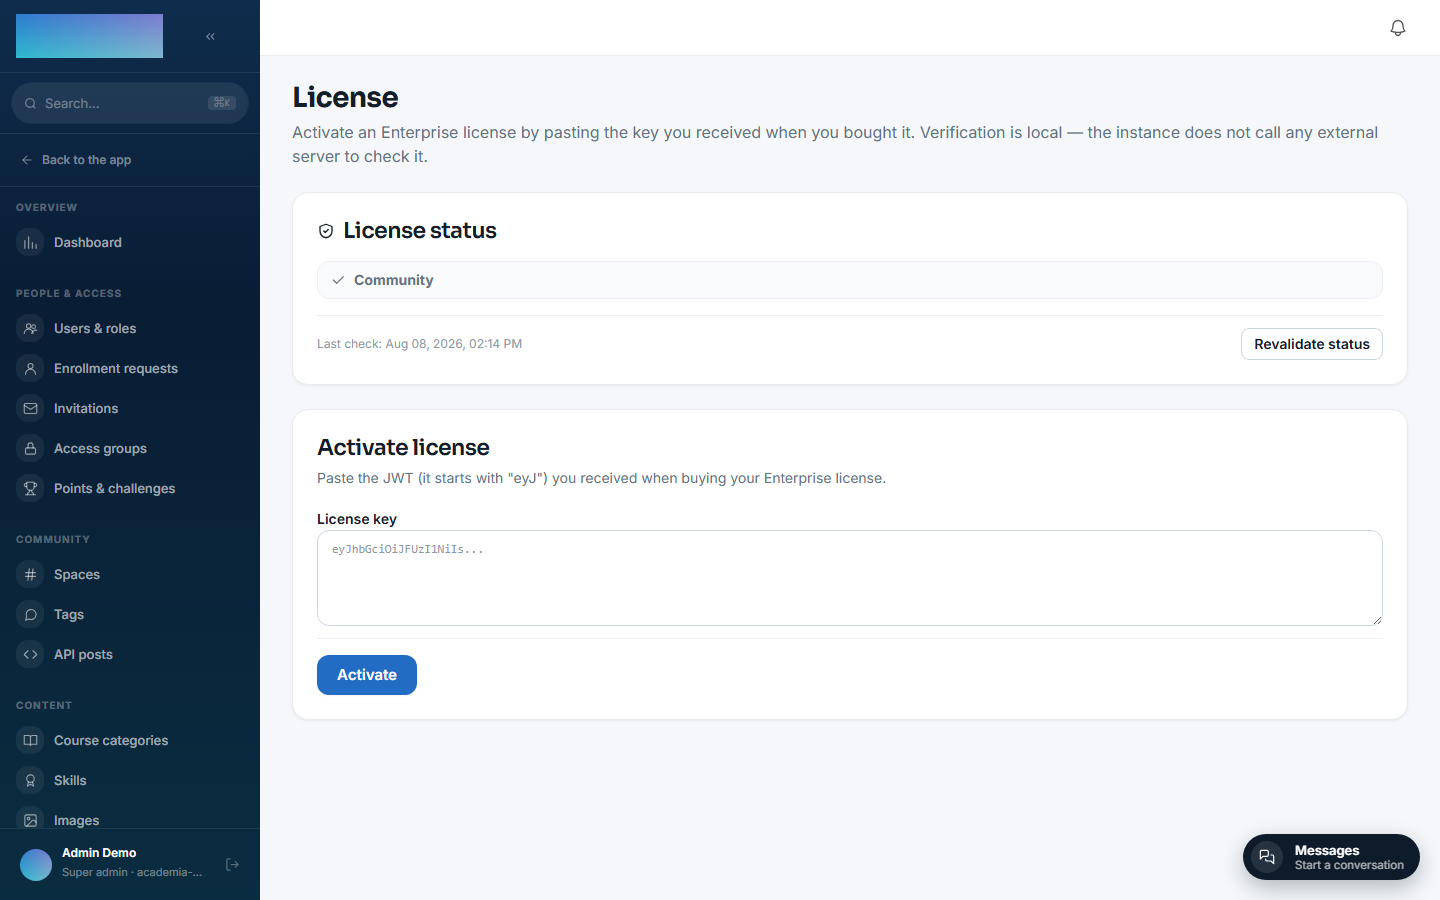
Community works in full without a license. Administration → License (/admin/licencia) shows the current status and lets you activate an Enterprise license by pasting the key — verification is local, with no calls to an external server. If the operator pinned DIDACTA_LICENSE_KEY through the environment, the screen becomes read-only; see License.
What these screenshots do not show
- The own-enrollments endpoint (
GET /me/enrollments) can take up to ~1 second to reflect a freshly created enrollment. If you have just redeemed a code and do not see the course immediately in some listing, reload.
Next step
- Visual walkthrough: notifications and sales — configure real SMTP and get the instance ready to sell courses and memberships.
- Configuration — real SMTP, S3 storage, AI.
- Managing modules — enable or disable optional modules.
- Backups — before there is any real data.