mod.theming — Visual customization
Community · Core category (always active)
What it does
Visual branding per organization: logo (uploaded to storage or a URL), brand display mode (logo only / logo and name), favicon, primary color expressed as an HSL hue + saturation, display and body font families, sanitised custom CSS, footer HTML and the headlines on the sign-in screens.
How it works
- The theme is loaded server-side in the web app's root layout and injects CSS variables that override the base design tokens: changing the hue propagates automatically to all 10 steps of the brand scale (
brand-50…900) — there is no need to touch tokens one by one. - Fonts are restricted to a whitelist of Google Fonts (Sora, Inter, Manrope, Space Grotesk, DM Sans, Plus Jakarta Sans…).
- Custom CSS is sanitised and capped at 16 KB; the footer HTML accepts only basic tags.
- The logo is served through a public endpoint (necessary on
/signin, before authentication) with a 5-minute cache. - The defaults are the Didacta identity (hue 213, saturation 70, Sora + Inter);
resetreturns to them.
Which part is Enterprise
Basic branding (logo, colors, fonts, headlines) is Community. Only customCss and footerHtml with actual content require the feat:white_label capability (saving a logo and colors without a license always works). Hiding the Didacta brand is also white-label.
Configuration
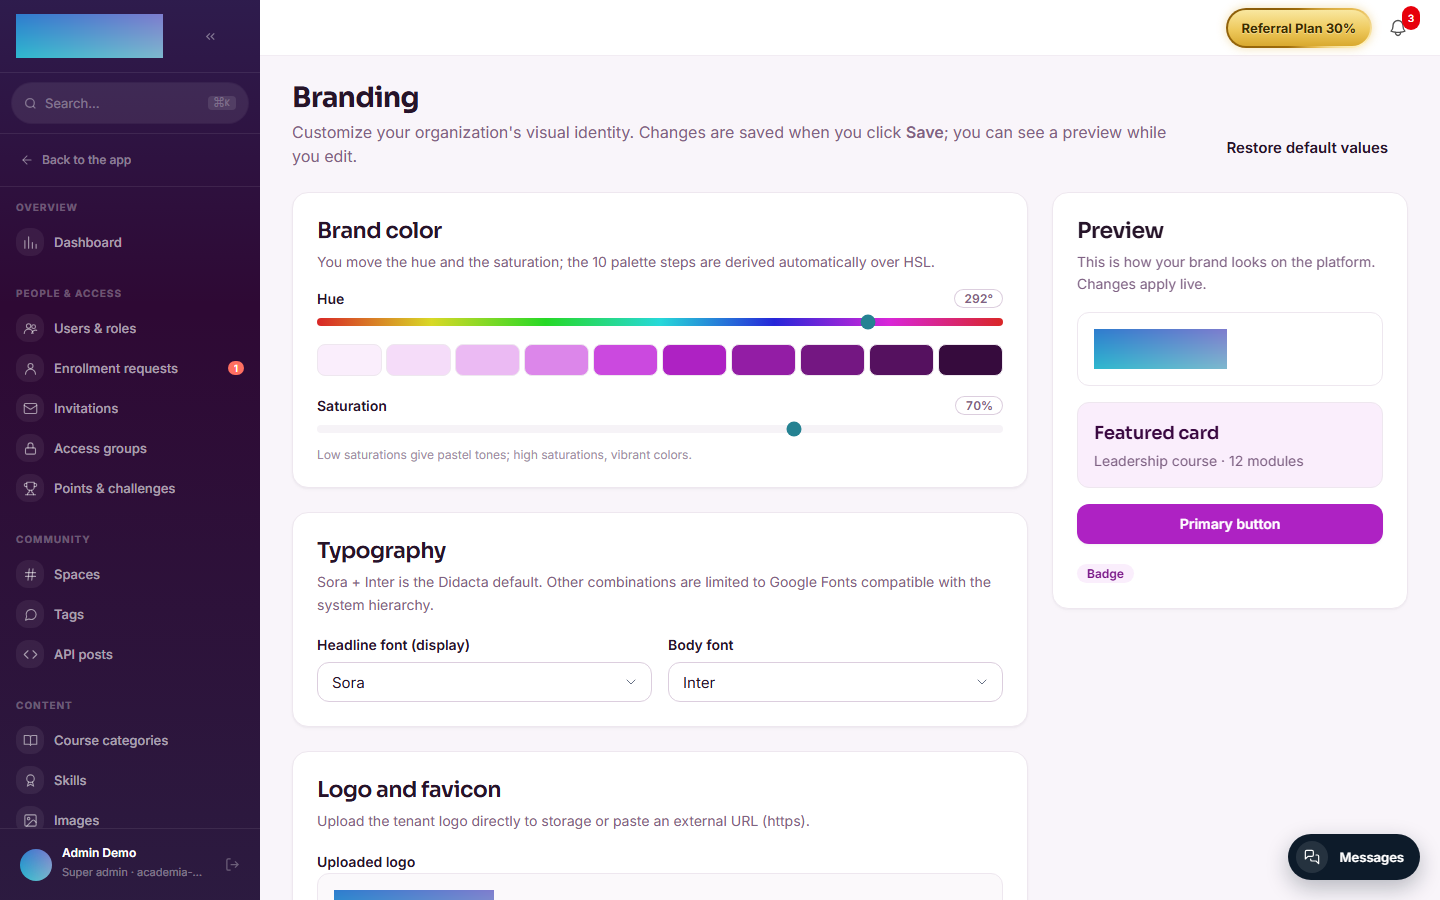
This is a core module: always active, it does not appear in the Modules tab switch. Everything is configured in Admin → Branding (/admin/branding), for tenant_admin and super_admin only, with a live Preview and a Restore default values button:
- Brand color: Hue (0–360) and Saturation (0–100) sliders, with the resulting
brand-50…900scale in view. - Typography: Headline font (display) and Body font, each with its whitelist.
- Logo and favicon: Upload logo to storage (PNG, JPG, SVG or WebP, 2 MB max; with Replace logo and Delete), or a Logo URL (alternative) (
https://…or a relative/api/v1/…endpoint), plus a Favicon URL. -
How should your brand be shown? — the logo mode (
logo_display_mode, added in alpha.113): Logo only (logo_only, shown whole at its own size; for logos that carry the name inside) or Logo and name (logo_and_name; for square or textless marks). The choice drives the classroom sidebar,/signinand the welcome assistant.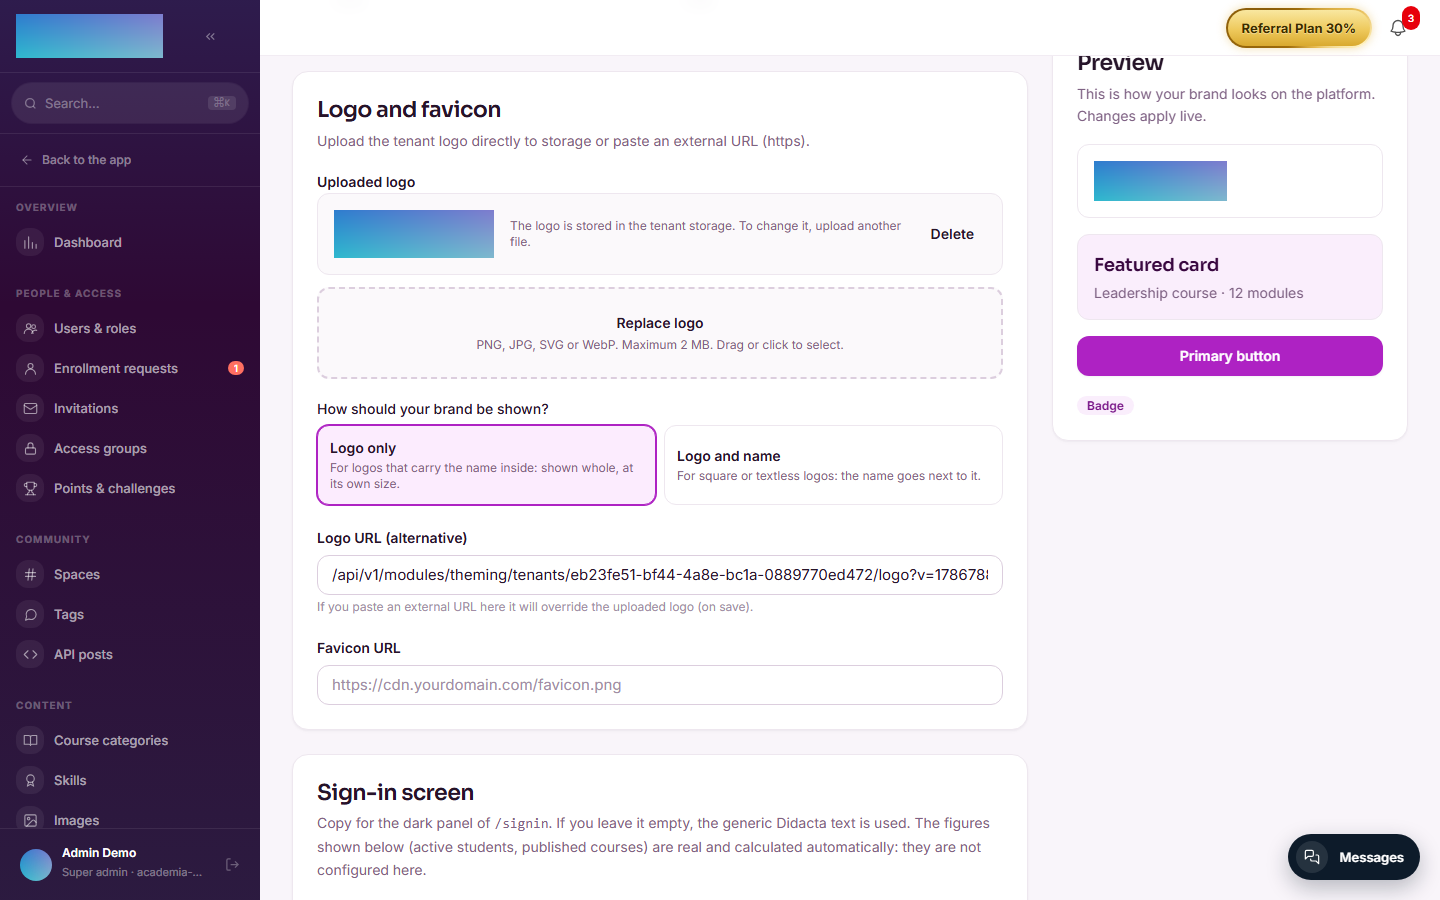
-
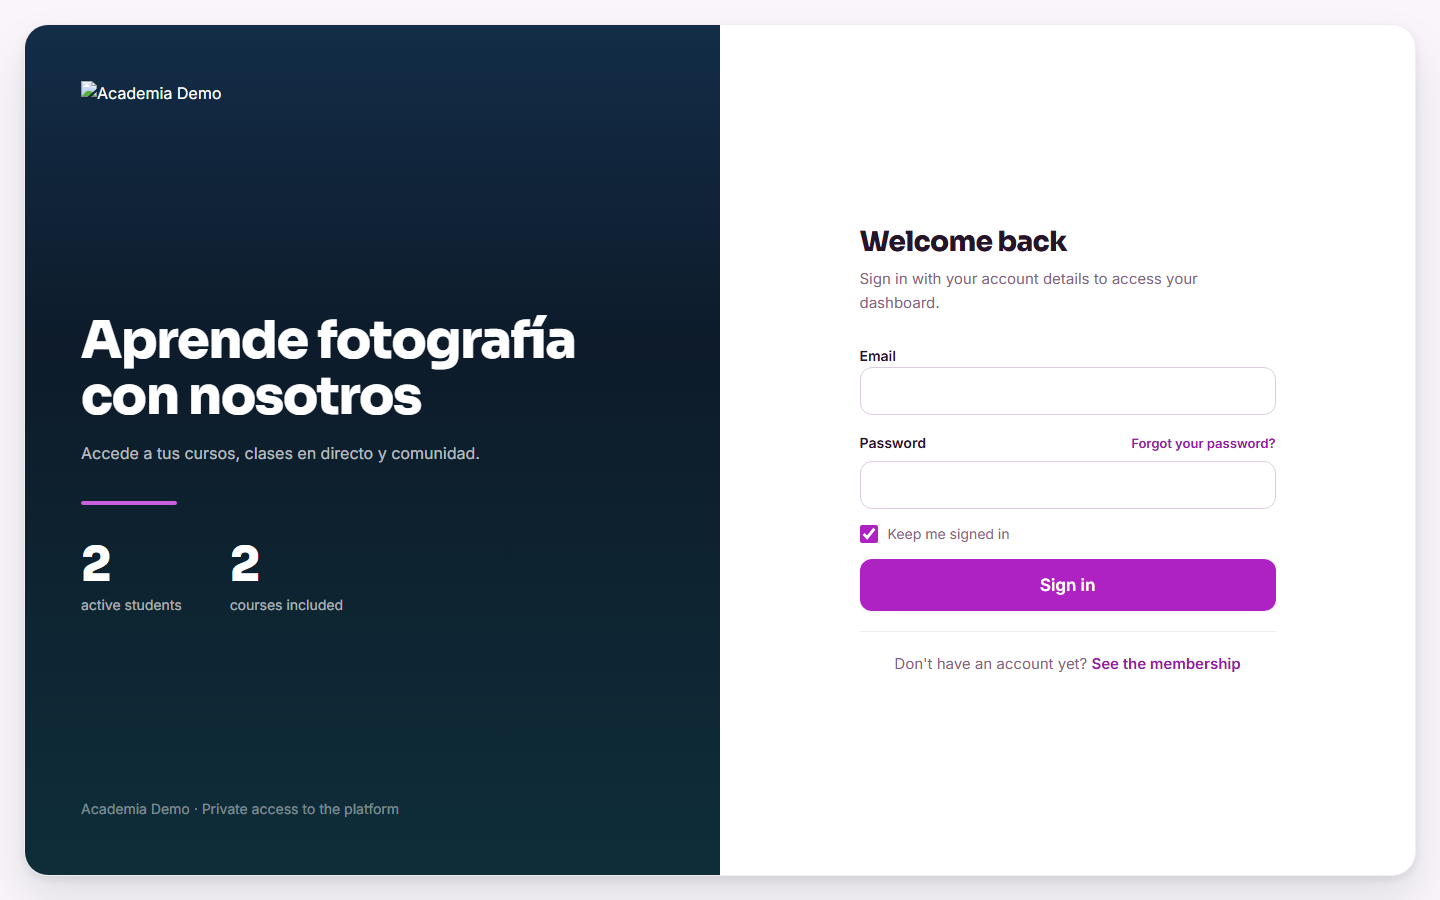
Sign-in screen: Headline (160 characters max) and Supporting line (optional) (240 max) for the
/signinbrand panel. - Custom CSS (advanced) (16 KB max) and Custom footer (4 KB max): they require the Enterprise
feat:white_labelcapability. Without a license an upgrade card is shown in their place, and the backend answers402to any attempt to save them with content — sending the fields empty or asnullis always allowed.
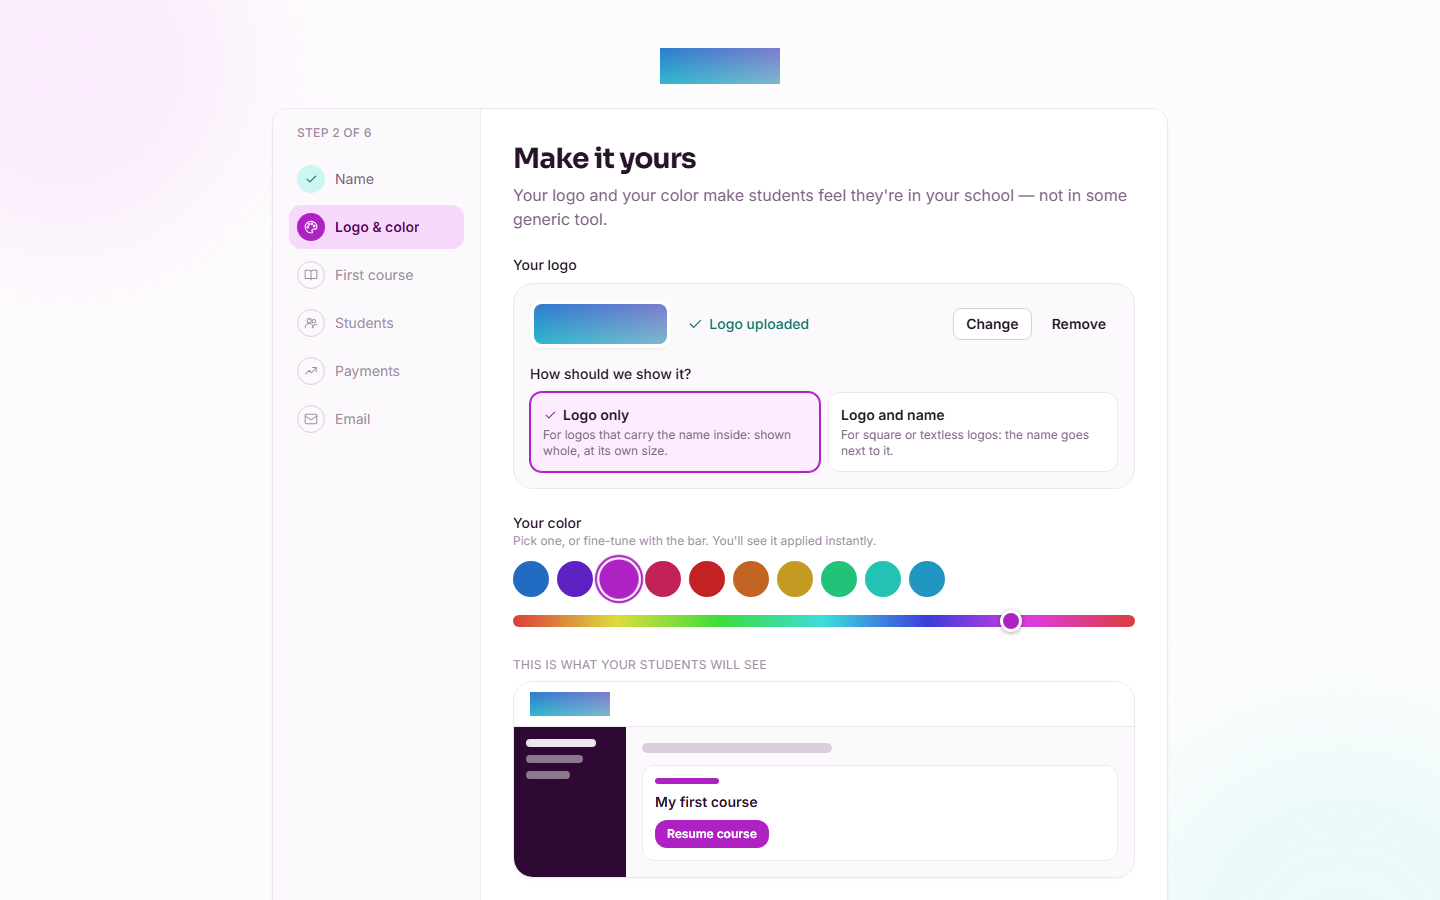
The Logo & color step of the welcome assistant (/bienvenida) configures the same things in a minimal version: upload the logo (applied instantly), pick How should we show it? (Logo only / Logo and name) and the color from 10 swatches + a fine-tune bar; color and mode are saved on continuing. It is one of the assistant's two mandatory steps (together with "Name").
No environment variables.
Step by step
- Go to Admin → Branding (
/admin/branding). The panel loads the tenant's current theme. - Move Hue and Saturation: the Preview column and the brand scale reflect the change instantly, without affecting other users yet.
- Upload your logo with Upload logo to storage (or paste a Logo URL (alternative)) and choose between Logo only and Logo and name under How should your brand be shown?.
- Adjust the fonts and, if you want, the sign-in screen's Headline and Supporting line (optional).
-
Click Save changes: the theme is persisted and applied to the whole organization (other users see it on reload, because it is injected server-side).
-
(Enterprise) With a
feat:white_labellicense, add Custom CSS (advanced) and a Custom footer. - Restore default values goes back to the Didacta identity in one click (it asks for confirmation).
For a brand-new academy, the /bienvenida assistant walks you through the same without entering the panel:
The result shows where your students see it first, the sign-in screen:
Dependencies
None.
Data model
mod_theming_tenant_theme — a single row per tenant holding all the branding.
API
Prefix /modules/theming (me, me/reset, me/logo, public logo). Details in Reference → Community and people.
Events
Emits: theming.logo.uploaded. It consumes none.